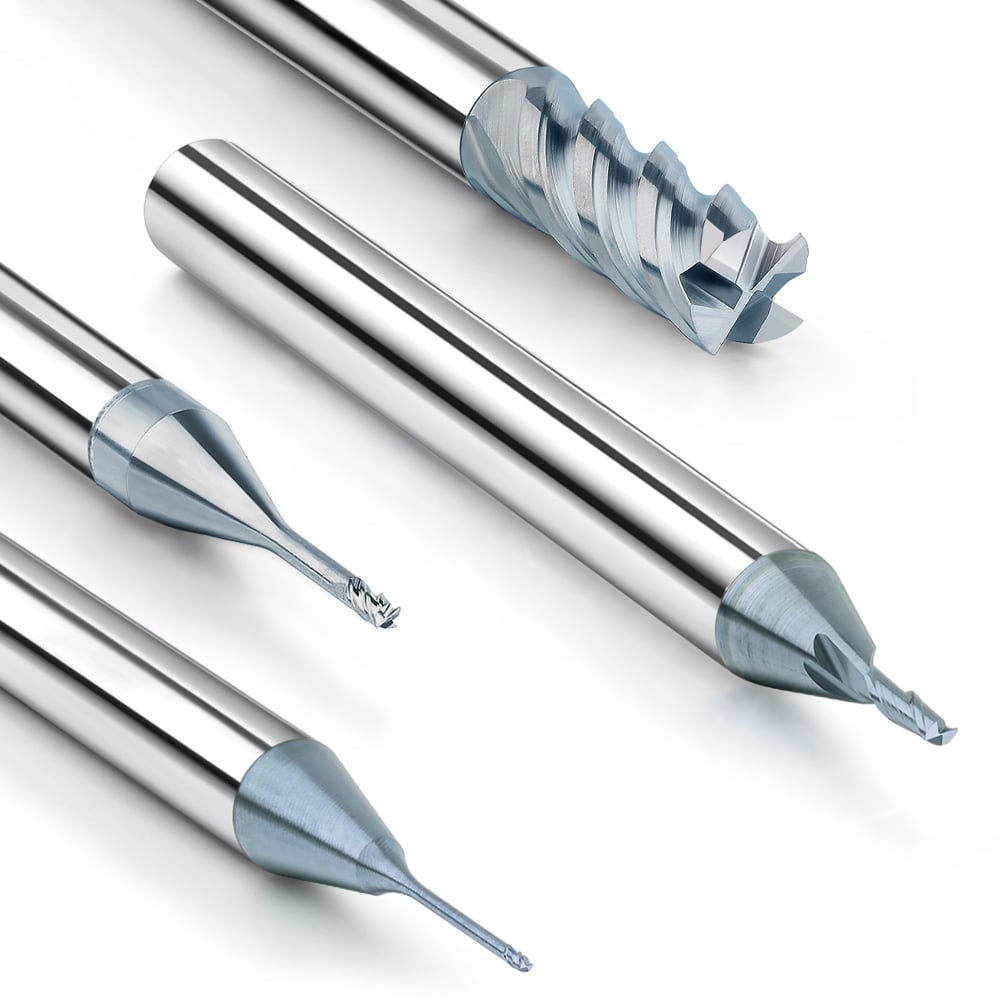
To achieve a truly stable and repeatable mirror finish, the selection and use of a finishing end mill are often more critical than subsequent polishing steps. Many machining issues do not result from insufficient machine tool precision but from details such as tool type, cutting parameters, and machining strategy. When every variable in the finishing stage is properly controlled, the tool itself can directly determine the final surface quality.
For parts requiring high surface quality, the finishing end mill is not primarily intended to remove large amounts of material. Instead, its role is to eliminate tool marks, vibration patterns, and microscopic steps left by rough machining while maintaining a minimal cutting load. This is why distinguishing between roughing and finishing end mills is particularly important: if roughing leaves uneven material or severe surface damage, even a high-quality finishing end mill will struggle to produce a true mirror finish.
For curved surfaces, mold cavities, and high-gloss parts, parameter control of ball-end finishing end mills is especially sensitive. Stepover, tool radius, and theoretical surface roughness are directly related. Using a ball end mill surface finish calculator provides a clear, quantitative basis to balance cutting efficiency with surface quality, avoiding time wasted on repeated trial cuts based on experience.
Moreover, achieving a mirror finish is not only about parameters; the manufacturing quality of the tool sets the upper limit of achievable results. Edge grinding consistency, coating uniformity, and tool runout control all become critical during finishing. In mass production or applications requiring high consistency, selecting a finishing end mill from a factory with mature processes and stable quality control is a key prerequisite for reliable mirror surface machining.
Core Requirements for Finishing End Mills to Achieve a Mirror Finish
Achieving a mirror finish primarily relies on tool stability and consistency during cutting. Minor edge defects, tool vibration, or geometric inconsistencies will leave visible marks on the workpiece. The finishing end mill must remove residual material from roughing passes with minimal cutting load to eliminate steps and leftover tool marks.
Selecting tools with high-precision edge grinding and uniform coatings can significantly reduce microscopic ripples, improving surface uniformity. Additionally, the cutting tool’s geometry, machining strategy, and machine tool rigidity collectively influence the final surface. For complex surfaces or mold cavities, stepover, tool tip radius, and cutting angles must be strictly controlled. Using a ball-end finishing mill with optimized stepover settings enables a smooth, continuous surface while maintaining machining efficiency.
The Decisive Influence of Cutting Edge Quality on Mirror Finishing
Cutting edge quality directly affects surface finish. High-precision ground tools minimize minor chipping and burr formation. Even with optimized cutting parameters, small edge defects can create periodic patterns, increasing surface roughness. In molds, aerospace parts, and high-gloss parts, cutting edge stability determines whether a mirror finish is consistently achievable.
Uniform and well-applied coatings also play a significant role. High-quality coatings reduce friction and chip adhesion, limiting heat-related material damage, controlling tool wear, and preserving surface quality. For ball end finishing mills, a sharp edge and consistent coating are critical for producing fine, uniform tool marks on complex surfaces, approaching polished-level mirror finishes.
How the Geometric Parameters of Finishing End Mills Affect Surface Roughness
Tool geometry—including tool tip radius, helix angle, number of flutes, and tool length—directly affects cutting path and the height of residual tool marks. Smaller tool tip radii follow surface contours more precisely but concentrate cutting forces, increasing tool wear. Larger tip radii provide smoother surfaces and higher efficiency. Optimizing helix angle and flute count can reduce vibration and cutting impacts, lowering surface roughness.
For ball end mills, stepover and cutting width are critical. Adjusting tool geometry and cutting strategy ensures even material removal per pass, minimizing the superposition of tool marks. Using a ball end mill surface finish calculator, theoretical surface roughness can be quantified, allowing precise control of machining parameters to achieve a continuous, uniform mirror finish.
Limitations of Tool Runout and Spindle Accuracy on Mirror Finish
Tool runout causes small vibrations and radial deviations during cutting, forming periodic ripples on the surface. Even with perfect tool edges, achieving a mirror finish is difficult. In high-gloss applications, small inaccuracies are amplified, especially for long tools or deep cavities, where surface defects from runout become noticeable.
Spindle accuracy is equally critical. Axial runout or low-precision spindles cause tool tip deviations during high-speed cutting, producing uneven tool marks. Achieving a stable mirror finish requires a high-rigidity machine, precision spindle, and stable tool and fixture mounting. Combining a high-precision finishing end mill with optimized cutting parameters minimizes the impact of runout and vibration, enabling ideal mirror surfaces in molds and precision parts.
How Roughing Quality Affects the Final Result of Finishing End Mills
The quality of mirror surface machining depends not only on finishing-stage tool selection and parameter control but also critically on roughing process quality. Uneven rough cuts or improperly set allowances can leave noticeable steps and residual tool marks on the workpiece surface. These defects are amplified during finishing, preventing the surface from reaching the desired smoothness. In mold cavities or complex surfaces, unstable roughing can even affect tool life and cutting stability.
Additionally, the roughing strategy directly influences the efficiency and surface quality of the finishing stage. Using tools that are unsuitable for the material or cutting conditions may result in overcutting, vibration, or chip accumulation. This increases tool wear and reduces the repeatability of mirror finishing. Proper planning of roughing paths and allowance distribution provides a smooth, uniform foundation for finishing, allowing finishing end mills to achieve optimal cutting conditions.
Surface Defects Caused by Improper Roughing Allowance Settings
When the roughing allowance is too large, the finishing tool must endure higher cutting loads, often leading to tool vibration, deeper tool marks, or minor chipping. This ultimately reduces surface quality. In deep cavities or curved areas, excessive allowance can cause tool deviation, leaving steps and residual marks that are difficult to remove, affecting the uniformity of the mirror-like finish.
Conversely, a smaller allowance reduces the cutting load on the finishing tool but may result in incomplete coverage of the surface, leaving small unmachined height differences. Using a ball end mill surface finish calculator allows precise calculation of theoretical allowances, enabling the cutting thickness of each pass to be optimized. This ensures smooth cutting under stable load, minimizing surface defects and enhancing the mirror effect.
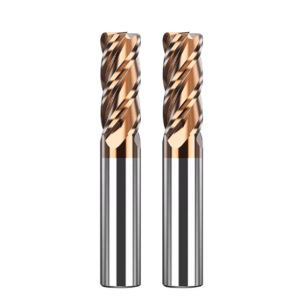
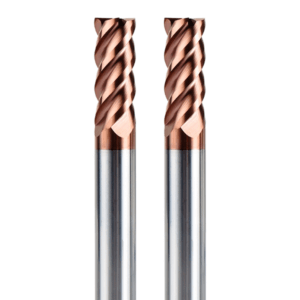
Essential Differences in Machining Objectives Between Roughing and Finishing End Mills
Roughing tools prioritize high material removal and cutting volume. Their cutting edges are robust, with smaller helix angles, allowing rapid removal of large amounts of material at the expense of surface accuracy. Finishing tools, by contrast, emphasize sharp edges and smooth, stable cutting to achieve extremely low surface roughness and uniform tool marks. Understanding these functional differences is critical when planning machining sequences and material removal strategies.
In practice, roughing establishes the approximate shape of the workpiece and uniform material removal, while finishing focuses on surface quality and detail. If tool type and cutting strategy are neglected during roughing, finishing end mills may struggle to perform optimally, resulting in unstable mirror finishes or noticeable local tool marks.
Optimal Material Removal Range for Switching from Roughing to Finishing
Setting an appropriate material removal range is crucial for high-quality mirror finishing. Finishing tools typically require uniform and moderate material removal to ensure that each pass smoothly eliminates residual material without excessive cutting loads or vibration. Material properties, tool radius, and surface complexity can guide this setting, often using empirical formulas or a ball end mill surface finish calculator.
This range must also consider tool wear and machining efficiency. By adjusting roughing depth and material removal while maintaining surface quality, tool life and machining speed can be balanced. This strategy is especially important for complex molds and high-gloss parts, as it directly impacts finishing end mill stability and the final surface consistency.
Optimization Methods for Finishing End Mill Cutting Parameters
Cutting parameters during finishing are critical to mirror surface quality. Even with high-quality tools, incorrect spindle speed, feed rate, or cutting depth can result in tool marks, micro-ripples, or chatter. Systematic optimization ensures stable cutting under low load, fully leveraging sharp edges to produce high-gloss surfaces with uniform tool marks.
Optimizing cutting parameters also extends tool life and enhances machining efficiency. In complex curved surfaces or mold cavities, controlling cutting load for each pass reduces tool wear, minimizes heat buildup, and maintains surface continuity. Using tools such as a ball end mill surface finish calculator allows precise quantification of how parameter changes affect theoretical surface roughness, providing a scientific foundation for mirror finishing.
The Direct Impact of Spindle Speed on Mirror Surface Finish
Spindle speed strongly affects cutting stability and surface quality. Low speeds can increase the height of cutting marks, creating periodic tool patterns, while high speeds may cause tool vibration or small areas of surface burning and micro-chipping. For ball-end mills on curved surfaces, even minor speed deviations are amplified, directly impacting smoothness and gloss.
Calculating optimal speed based on tool radius and material hardness allows the tool to operate under low vibration with high cutting stability. Adjusting spindle speed along with machine rigidity and fixture stability ensures consistent surface quality and extends finishing end mill life, improving repeatability.
Typical Surface Problems Caused by Excessive or Insufficient Feed Rate
Improper feed rate control is a major factor in surface roughness and uneven tool marks. High feed rates increase cutting loads, causing vibration and noticeable marks, making a mirror-like finish difficult. Low feed rates may improve surface quality but reduce efficiency and can cause localized overheating or uneven tool wear.
Optimal feed rate depends on material hardness, tool geometry, and cutting depth. In curved surfaces or mold cavities, controlling feed ensures consistent material removal per pass, avoiding overlapping tool marks or micro-steps. Coupled with roughing vs finishing end mill strategies, feed rates can be staged to achieve high-efficiency mirror finishing while minimizing post-processing.
Control Principles of Axial and Radial Cutting Depth in Mirror Surface Machining
Cutting depth significantly affects both surface quality and tool stability. Excessive axial or radial depth increases cutting load, causing vibration and localized tool marks that degrade the mirror finish. Shallow depths reduce cutting load but increase the number of passes, lowering efficiency and potentially causing uneven wear.
For ball-end milling and complex surfaces, axial and radial depths should match tool radius, stepover, and machine rigidity to ensure uniform cutting and minimize residual marks. Scientific depth control maintains surface continuity, extends tool life, and enhances finishing end mill stability and repeatability for high-precision mold and high-gloss part machining.
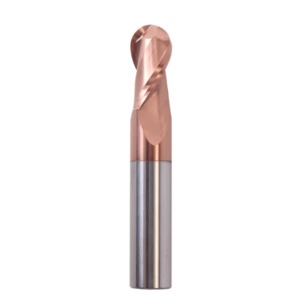
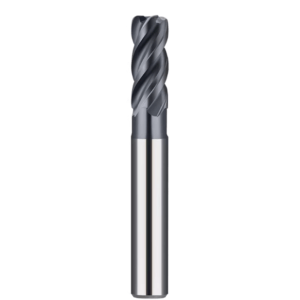
Application Techniques of Ball Nose Finishing End Mills in Mirror Finishing
In high-precision curved surface and complex cavity machining, ball nose end mills provide stable cutting contact and continuous cutting paths, significantly improving surface smoothness. Their spherical tip reduces overlapping cutting marks, making them ideal for molds, aerospace components, and high-gloss parts. By carefully planning tool paths and stepover, the cutting load is evenly distributed, ensuring consistent material removal with each pass and achieving a high-quality mirror-like finish.
Ball-nose end mills excel not only in surface finish but also in handling complex curved and inclined surfaces. On modern multi-axis CNC machines, these tools follow surface contours smoothly, minimizing vibration and localized cutting forces while maintaining stability. Even in complex mold cavities, this ensures uniform tool marks and a smooth surface, providing reliable conditions for subsequent processing or direct use.
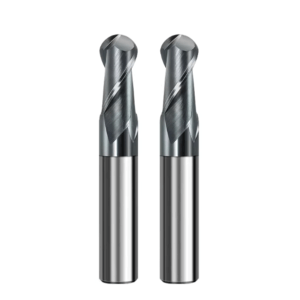
Advantages of Ball Nose End Mills in Curved Surface Mirror Finishing
Ball-nose end mills maintain continuous contact on curved surfaces, avoiding steps and uneven textures caused by insufficient local contact. Compared to flat-bottom tools, they adapt to curvature changes during machining, maintaining uniform cutting loads and significantly improving surface gloss and consistency. This continuous cutting characteristic directly affects the quality and repeatability of mirror finishing in high-gloss molds and precision assemblies.
Additionally, ball-nose end mills reduce cutting vibrations, minimizing the impact of tool wear on surface roughness. Their sharp cutting edges and optimized helix angles efficiently remove chips, reducing adhesion and overheating. This advantage is particularly evident when machining harder materials or deep cavities, enabling single-pass mirror-quality finishes on high-precision curved surfaces.
Mechanism of Stepover’s Influence on Surface Texture
Stepover directly affects surface smoothness and the height of cutting marks. Oversized stepovers leave gaps between passes, forming noticeable marks and increasing surface roughness. Smaller stepovers reduce marks but increase machining time and tool wear. Careful step size planning ensures continuous and uniform coverage, which is key to achieving a high-gloss surface.
In complex surface machining, step size relates to tool radius, tip radius, and the cutting path. Scientific planning of step size allows each pass to produce evenly distributed material removal, avoiding ripples or small steps. Optimizing step size balances efficiency and surface quality, enabling ball-nose end mills to perform effectively in mold cavities and precision surfaces.
Using a Ball End Mill Surface Finish Calculator to Determine Optimal Stepover
A ball end mill surface finish calculator computes theoretical surface roughness based on tool radius, step size, and desired finish, guiding practical parameter settings. By simulating different step sizes, engineers can identify the best cutting plan to achieve mirror-quality surfaces while maintaining processing efficiency.
Entering material type, tool diameter, and target roughness into the calculator provides recommended step sizes and cutting parameters. These results can be integrated directly into CAM tool path planning, fine-tuning stepovers and strategies to ensure continuous, stable cutting and mirror-like results. This approach also extends tool life and maintains finishing end mill stability.
Parameter Setting Logic Based on the Ball End Mill Surface Finish Calculator
Achieving mirror-like surfaces in high-precision molds requires not only quality tools but also scientifically optimized cutting parameters. The calculator quantifies the impact of tool radius, step size, and cutting strategy on surface roughness, providing a basis for tool path and load optimization. This reduces trial cuts and tool wear while maintaining surface quality.
Parameter settings should balance surface finish, processing efficiency, and tool life. In complex curved surfaces or deep cavity molds, using the calculator to plan tool paths and step sizes ensures that the finishing end mill maintains stable cutting, producing uniform surfaces and improving production consistency.
Relationship Between Surface Roughness and Tool Radius
Tool radius directly affects surface smoothness. Larger radii cover more material, reducing residual steps and producing smoother surfaces. Smaller radii suit detailed features but may leave overlapping micro-marks, increasing roughness. For high-gloss molds and precision parts, selecting the proper radius ensures continuous, smooth cutting.
Using a calculator, engineers can quantify surface roughness for different tool radii. Simulating radius and step size combinations optimizes tool selection and path planning, reducing the need for polishing and directly achieving mirror-quality surfaces.
Balancing Machining Efficiency and Mirror Quality
Optimizing step size and cutting parameters requires balancing efficiency with surface quality. Very small step sizes improve smoothness but increase machining time and tool wear; very large step sizes create noticeable marks. A surface finish calculator allows engineers to simulate outcomes and identify the optimal parameters.
The calculator can also set cutting amounts per pass based on material hardness, tool diameter, and surface complexity, helping the finishing end mill maintain stable cutting, mirror finish quality, and production consistency, while reducing trial cuts and improving yield.
Practical Application of Calculator Results in CAM Paths
Step size, cutting depth, and tool radius values from the calculator can be directly integrated into CAM software. Mapping theoretical parameters to actual tool paths ensures even cutting across curved surfaces, avoiding overcutting or residual steps.
In multi-axis machining or complex molds, combining calculator results with CAM paths ensures smooth, consistent mirror finishes, optimizes cutting sequences and tool load distribution, and minimizes tool marks and micro-vibrations, enhancing repeatability and efficiency.
Differences in Achieving Mirror Finish with Finishing End Mills on Different Materials
Cutting tool requirements vary greatly depending on the material, directly impacting the achievement of a mirror finish. Softer materials, such as aluminum alloys, are prone to chip adhesion and surface imperfections, while harder materials, like mold steel, are more susceptible to tool wear and vibration. Achieving a high-gloss mirror finish on different materials requires careful optimization of tool selection, cutting parameters, and machining paths, ensuring smooth cutting, continuous surface, and uniform tool marks with each pass.
Material characteristics also dictate strategies for roughing allowance, step size, and cutting depth. By adjusting these machining parameters and combining them with sharp cutting edges and stable performance of high-quality finishing end mills, engineers can achieve repeatable mirror finishes across different materials. This improves processing efficiency, workpiece yield, and reduces the need for subsequent polishing or finishing operations.
Key Control Points for Mirror Finishing of Aluminum Alloys
Aluminum alloys are sensitive to chip adhesion and heat generation. Achieving a mirror finish requires careful control of cutting temperature and effective chip evacuation to prevent chip buildup on the tool or workpiece surface, which can cause scratches. Selecting sharp finishing end mills with uniform coatings and properly setting spindle speed and feed rate are essential for maintaining smooth surfaces.
Optimizing step size and cutting depth is particularly important for curved surfaces. Smaller step sizes reduce the height of tool marks, but must be balanced with tool radius and allowance calculations. By carefully planning the cutting path and using a ball end mill surface finish calculator, a continuous and smooth high-gloss surface can be achieved while maintaining processing efficiency and tool life.
Suppressing Vibration and Built-up Edge in Stainless Steel Mirror Finishing
Stainless steel is prone to vibration and built-up edge formation, both of which directly impact surface finish and tool life. Vibration causes tool tip displacement, forming periodic tool marks, while built-up edge on the cutting edge creates localized height variations, reducing mirror quality. Careful control of spindle speed, feed rate, and coolant flow effectively suppresses these issues.
Selecting coated tools optimized for stainless steel and planning cutting strategies carefully are also critical. Reducing cutting load and optimizing tool paths help maintain stable cutting and surface uniformity. Combined with step size calculation and allowance control, tool marks and micro-ripples can be minimized, enabling high-gloss mirror finishes on stainless steel parts.
Strategies for Addressing Tool Wear in Mold Steel Mirror Machining
Mold steel’s high hardness leads to rapid tool wear, causing tool marks and surface roughness fluctuations that affect mirror finish quality. Controlling cutting depth, feed rate, and spindle speed reduces cutting load, extending the life of sharp edges and ensuring surface uniformity. High-quality coated tools and optimized tool geometry further mitigate wear.
For complex surfaces or deep cavity molds, careful planning of tool paths and cutting sequences distributes cutting load and reduces localized wear. Combining roughing and finishing end mill strategies and using dedicated finishing tools for the final pass ensures mold steel surfaces achieve mirror-level finishes, reducing the need for additional finishing operations.
Common Machining Errors That Prevent Achieving a Mirror Finish
Even with high-performance tools and optimized cutting parameters, improper machining can prevent achieving a mirror finish. Common errors include using inappropriate tool types, neglecting machine rigidity and fixture stability, and improper cooling or lubrication. These factors negatively impact surface finish, increase tool wear, and cause localized defects.
Surface quality is influenced by the cumulative effect of multiple factors. Even if individual parameters are properly controlled, a lack of coordination in the overall machining strategy can result in periodic tool marks, microscopic steps, or vibration ripples. Avoiding these errors is essential for maintaining repeatability and stability when finishing high-gloss molds and complex surfaces.
Incorrect Use of Roughing End Mills for Finishing
Roughing end mills are designed for high material removal rates. Their robust cutting edges lack sufficient sharpness for finishing, leaving noticeable tool marks and microscopic steps. Using roughing tools for finishing operations results in excessive surface roughness and prevents a high-gloss mirror finish. This error is amplified in complex surfaces and mold cavities, increasing the workload for subsequent polishing.
Roughing end mills can also vibrate or chip under low-load finishing conditions, creating surface discontinuities. Even with high-precision machines and optimized tool paths, improper tool use cannot eliminate machining residue. Correctly distinguishing between roughing and finishing end mills and planning machining sequences is crucial for successful mirror finishing.
Consequences of Ignoring Machine Rigidity and Clamping Stability
Insufficient machine rigidity or unstable clamping causes cutting vibrations and tool tip deflection, producing periodic tool marks and microscopic ripples. Even with high-precision finishing end mills, surfaces may display uneven tool marks or localized roughness. This effect is especially pronounced in deep cavities or complex surfaces, directly lowering mirror quality and consistency.
Unstable clamping can also cause minor workpiece displacement during cutting, increasing tool load and accelerating wear. Over time, these errors accumulate, preventing a consistent mirror finish. Enhancing machine rigidity, optimizing fixture design, and ensuring secure clamping maximizes tool performance, maintaining high-gloss surface continuity and uniformity.
Impact of Improper Cooling Methods on Surface Quality
Improper cooling or lubrication raises cutting temperatures, causing burn marks or material adhesion to the cutting edge. This results in localized tool marks or built-up edge, reducing surface finish. In high-hardness materials or deep cavities, insufficient coolant flow or incorrect spray angles worsen tool wear, affecting edge sharpness and mirror finish quality.
Additionally, uneven thermal expansion during cutting from improper cooling can destabilize tool-workpiece contact, causing vibration or slight deviations. These factors leave noticeable marks on high-gloss surfaces. Selecting the appropriate coolant type, flow rate, and spray position, combined with high-performance finishing end mills, effectively controls cutting temperature and chip evacuation, improving surface continuity and mirror finish quality.

How to Reduce or Eliminate Polishing Processes with Finishing End Mills
By precisely controlling cutting parameters and optimizing tool paths, high-performance finishing end mills can directly achieve a mirror finish during the machining stage, reducing or even replacing traditional polishing processes. This approach decreases labor and time costs while minimizing dimensional errors and material loss from secondary processing. In mold production, precision components, and high-gloss parts, a carefully planned cutting strategy allows the tool to achieve near-polished surface quality in a single pass.
Moreover, achieving a mirror finish directly with the tool improves production efficiency and machining stability. By optimizing step size, cutting depth, and tool radius, and integrating these with a ball end mill surface finish calculator, uniform cutting along curved surfaces can be ensured, eliminating residual tool marks and producing consistent mirror finishes. This approach allows finishing and mirror forming to be performed simultaneously, shortening the machining cycle and enhancing part quality.
Cost Comparison of Mirror Machining and Traditional Polishing
Traditional polishing requires manual labor or secondary equipment, which is both time-consuming and costly. Manual operations increase labor costs and may lead to uneven surfaces and dimensional errors. In contrast, achieving a mirror finish directly with finishing end mills minimizes manual intervention and secondary finishing, improving process consistency and repeatability.
High-quality finishing end mills with optimized cutting parameters can produce a mirror finish in a single pass, substantially reducing manufacturing costs. Eliminating or reducing polishing also decreases material waste and rework, particularly in mass production of molds, aerospace components, and high-gloss parts, enhancing production efficiency and economic benefits.
Impact of Single-Pass Finishing on Mold Cycle Time
Using a finishing end mill to achieve a mirror finish in a single pass significantly shortens mold processing cycles. Traditional workflows often require multiple polishing steps, increasing total processing time and complexity. Direct mirror machining with a finishing end mill reduces process steps, minimizes clamping errors, and avoids tool marks from multiple setups. Additionally, single-pass finishing improves dimensional accuracy and surface quality, allowing molds to proceed to trial or mass production faster. Combined with optimized cutting strategies and step size control, processing cycles can be minimized while maintaining consistent mirror finishes.
Suitable Parts for Direct Mirror Finishing
Parts with smooth surfaces, uniform wall thickness, and minimal geometric complexity are most suitable for single-pass mirror finishing. Examples include mold cavities, aerospace component exteriors, and high-gloss decorative parts. For these parts, the tool can cut continuously, minimizing vibration and residual steps, resulting in a uniform mirror finish.
Conversely, complex parts with deep cavities, sharp angles, or narrow grooves may require localized polishing. Analyzing part geometry, surface curvature, and machining allowance enables engineers to determine which areas can be finished directly with cutting tools and which require secondary finishing, balancing efficiency and surface quality.

The Impact of High-Quality Finishing End Mill Manufacturers in China on Mirror Finishing
Mirror finishing quality depends not only on tool type and machining parameters but also on the manufacturing quality of the tool itself. High-precision, consistent tools provide stability during cutting, reducing tool marks and residual steps. Selecting finishing end mills from manufacturers with mature process systems ensures edge consistency, coating quality, and substrate stability, achieving repeatable mirror finishes in complex surfaces and molds.
Additionally, high-quality tools maintain performance during long-term machining, reducing vibration and wear impact on surface finish. In mass production, tool stability ensures consistent surface quality, shortens processing cycles, and improves output. Choosing reputable Chinese finishing end mill manufacturers provides a controllable machining process, securing mirror finishes from the source.
Key Capabilities of Chinese Manufacturers in Edge Grinding Consistency
Edge grinding consistency directly impacts the stability of each cut and surface uniformity. Precisely ground edges minimize micro-chipping and tool marks, ensuring fine, consistent mirror finishes. In complex curved surfaces or mold cavities, small inconsistencies in cutting edges can amplify surface roughness fluctuations, reducing finish quality and repeatability.
Leading Chinese manufacturers employ advanced CNC grinding equipment and rigorous quality inspections for cutting edges, ensuring consistency in mass-produced tools. This improves the service life and machining stability of finishing end mills, supporting reliable mirror machining.
The Role of Tool Coating and Substrate Stability in Mirror Finish
Tool coating and substrate stability are critical for heat distribution, friction control, and wear resistance during cutting. A uniform, well-adhered coating reduces cutting resistance, prevents material adhesion, and maintains surface smoothness. Stable substrates minimize vibration and displacement during high-load or complex surface machining, improving surface continuity.
For mold steel and high-hardness materials, these factors are particularly crucial. High-quality finishing end mills retain sharp edges over extended cutting periods, minimizing periodic tool marks and micro-steps, ensuring consistent, repeatable mirror finishes—especially valuable for mass production and high-precision molds.
Technical Indicators When Choosing a Chinese Finishing End Mill Manufacturer
Key considerations include precision of edge grinding, coating technology, and substrate material stability. Precise grinding ensures sharp, uniform edges. Coating quality affects tool life and cutting stability. Stable substrates prevent deformation during prolonged cutting. Evaluating these factors ensures the tool remains optimal throughout machining, achieving consistent mirror finishes.
Additionally, factory quality control and inspection methods are critical. Top Chinese manufacturers implement rigorous inspections, edge testing, and coating thickness control, ensuring consistent performance across tool batches. This supports high-gloss mold and precision part machining, reduces process uncertainty, and improves production efficiency.

Controlling the Lifespan and Stability of Finishing End Mills in Mirror Machining
Tool life and stability directly affect mirror finish repeatability. Aluminum, stainless steel, and mold steel tools experience wear, edge dulling, or coating degradation over prolonged cutting, increasing surface roughness, tool marks, and localized vibration. To maintain mirror quality, it is essential to manage tool selection, parameter optimization, and cutting strategies simultaneously, ensuring stable finishing end mill performance throughout the machining cycle.
Tool stability also depends on machine rigidity, clamping security, and cooling. Step size control, depth optimization, spindle speed, feed adjustments, and high-quality tool selection all reduce vibration and residual tool marks, extending tool life and enabling continuous mirror machining. Proper tool and process management ensures part consistency, efficiency, and economic benefit.
Manifestations of Tool Wear on Surface Roughness
As cutting edges dull, vibrations and cutting discontinuities increase, raising surface roughness. Worn tools leave periodic tool marks, steps, and ripples, especially in high-hardness materials like mold steel. Even with precise spindle accuracy and feed control, worn tools cannot guarantee mirror-finish uniformity.
Wear also impairs chip evacuation, leading to adhesion or built-up edges, which create scratches or ripples. Maintaining tool edges, monitoring wear in real time, and optimizing cutting parameters are crucial for consistent mirror finishes.
When to Replace Finishing End Mills
Replace tools when surface roughness increases, tool marks enlarge, or localized vibrations appear. In deep cavities or complex surfaces, minor wear amplifies, affecting overall mirror consistency. Timely replacement ensures surface quality, reduces cutting heat accumulation, and extends machine and fixture life.
Using high-quality tools from reputable Chinese manufacturers, combined with tool life management, allows prediction of replacement cycles through early measurement and calculations. Integrating a ball end mill surface finish calculator and monitoring cutting parameters effectively controls tool usage, ensuring consistent mirror-finish results in mass production.
Extending Stable Tool Working Range Through Parameter Optimization
Optimizing spindle speed, feed rate, step size, and depth of cut extends stable tool working range. Excessive load or overly high feed rates accelerate wear and degrade surface finish. Proper parameter optimization allows sharp edges to remain effective longer, maintaining continuous mirror finishes.
Combining tool geometry, material properties, and CAM path planning distributes cutting load, reduces localized wear and vibration, and ensures stable finishing end mill operation. This is critical in complex surfaces and mold cavities, enabling continuous production of high-gloss parts while maximizing machining efficiency and consistency.