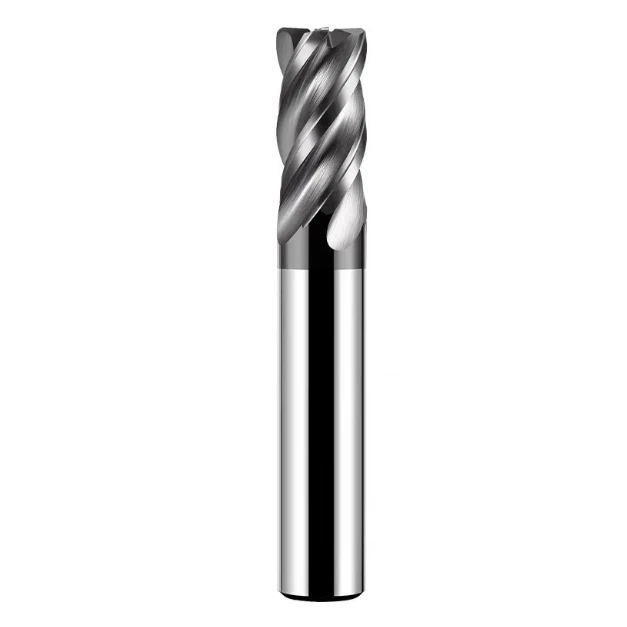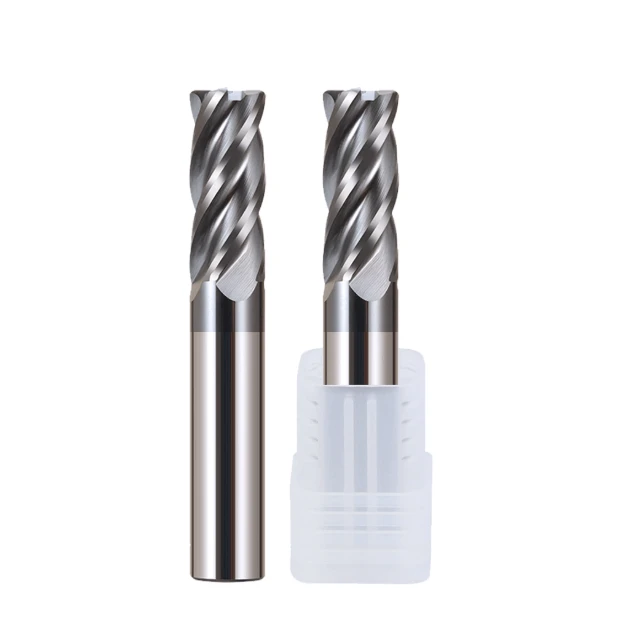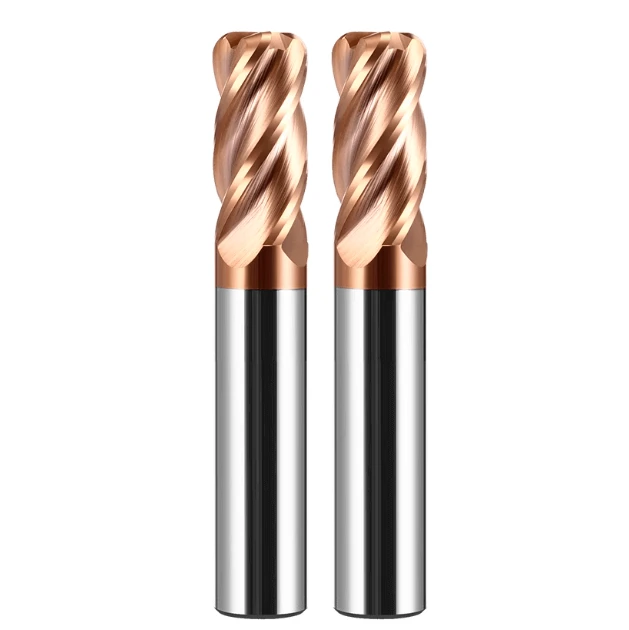


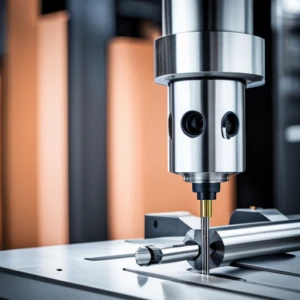
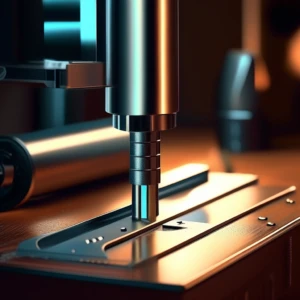
In the process of roughing end mills, roughing is a key step to remove a large amount of material and prepare for subsequent finishing. Due to the importance of this process, avoid any mistakes that may affect the quality and efficiency of processing. Any negligence or mistakes may cause problems in the processing process, which will not only affect the smooth progress of subsequent processes, but also may add additional time and cost.
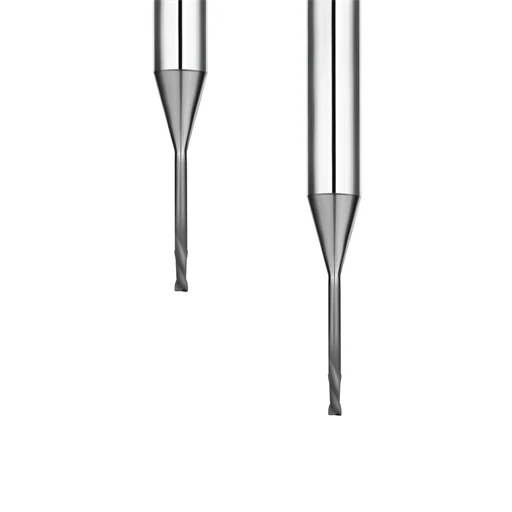
Milling Cutter Cutting Tool Problem
Cutting Tools Wear Out Too Quickly
- Choose the right milling cutter tool material and coating. Choose milling cutter types with high wear resistance, such as carbide or ceramic cutters, and consider using cutters with wear-resistant coatings (such as TiN, and TiAlN) to extend tool life.
- Optimize cutting parameters. According to the workpiece material and processing conditions, reasonably adjust the cutting speed, feed rate, and cutting depth. Generally, the cutting speed and feed rate can be appropriately reduced to reduce tool wear.
- Use efficient coolant. Choose the type of coolant suitable for the processing material, ensure that the coolant flow is sufficient, spray directly into the cutting area, and keep the cutting temperature within a reasonable range.
- Check and replace tools regularly. Establish a tool management system, regularly check the wear of the tool, and replace or re-sharpen the tool in time to prevent excessive wear from affecting the processing quality.
Cutting Tool Breakage
- Choose high-strength roughing tool materials. Use high-strength and high-toughness tool materials, such as cemented carbide and superhard materials, which can better withstand cutting forces and reduce the risk of breakage.
- Avoid excessive cutting depth and feed speed. Reasonably set the cutting depth and feed speed to avoid removing too much material at one time, which may cause the tool to be subjected to excessive cutting forces and break.
- Keep the tool and workpiece well fixed. Ensure that the tool and workpiece are firmly installed to avoid vibration or displacement during the cutting process, which increases the risk of tool breakage.
- Use pretreatment and mitigation methods. Before processing hard or high-strength materials, preheat the workpiece, or use vibration cutting, ultrasonic cutting and other methods to reduce the possibility of tool breakage.
Rough Milling Cutter Tool Chipping
- Select the appropriate tool angle. According to the processing material and processing method, select the appropriate tool rake angle, relief angle, and cutting edge angle to enhance the cutting performance and chipping resistance of the tool.
- Reduce cutting vibration. By optimizing cutting parameters, improving machine tool rigidity, and improving workpiece fixing methods, reduce vibration during cutting and avoid tool chipping.
- Use appropriate cutting fluid. Select the appropriate type of cutting fluid and ensure that the cutting fluid can fully lubricate and cool the cutting area to reduce the occurrence of tool chipping.
- Check the tool edge regularly. Check the tool edge status regularly, and promptly grind or replace tools that have shown signs of chipping to avoid affecting the processing quality.
Short Roughing Tool Life
- Choose high-durability rough milling end cutter materials. Using tool materials with high durability and good wear resistance, such as superhard materials, ceramic materials, etc., can significantly extend tool life.
- Optimize cutting parameters. According to the workpiece material and processing technology, the cutting speed, feed speed, and cutting depth should be reasonably set to reduce tool wear and damage.
- Use an efficient cooling and lubrication system. An efficient cooling and lubrication system is adopted to ensure that the coolant can fully cover the cutting area, reduce cutting temperature, and reduce tool wear.
- Maintain and maintain knives regularly. Establish a tool maintenance system, check, clean, and maintain the tools regularly, and promptly repair or replace damaged tools to extend the service life of the tools.
Failure of Coating on Rough Milling Tools
- Choose high-quality coatings. Choose high-quality coated tools from well-known brands, such as TiN, TiAlN, and other coatings, to ensure that the coating has good wear resistance and thermal stability.
- Control cutting temperature. By optimizing cutting parameters and using high-efficiency coolants, keep the temperature of the cutting area within the tolerance range of the coating to avoid failure of the coating due to high temperature.
- Avoid excessive cutting force. Reasonably set the cutting depth and feed speed to avoid damage and shedding of the coating caused by excessive cutting force.
- Check the coating status regularly. Check the status of the tool coating regularly, and promptly detect and deal with problems such as coating wear and shedding to avoid affecting the processing quality due to coating failure.
Uneven Wear on Roughing Tools
- Adjust tool position. Ensure that the tool is evenly stressed during machining to avoid unilateral wear. For example, use symmetrical cutting paths to ensure that all parts of the tool are evenly stressed.
- Optimize cutting paths. Use reasonable cutting paths to avoid repeated cutting of the same area. Ensure that the cutting path is smooth to reduce tool load changes.
- Use efficient coolant. Ensure that the coolant fully covers the cutting area and cools the tool evenly. Especially in high-temperature areas, enhance the cooling effect.
- Rotate the tool regularly. Rotate the tool regularly or use a multi-edge tool to ensure that each edge is evenly stressed and worn. Adjust the rotation frequency according to the tool wear.
Cutting Tool Runout
- Check the tool holder. Make sure the tool holder is tight and not loose. Regularly check and maintain the holder to prevent wear and looseness.
- Correct the tool and spindle. Make sure the tool and machine spindle are concentric to avoid runout. Use precision correction tools to check and adjust concentricity.
- Use high-precision tools. Choose tools made with high precision to reduce runout caused by manufacturing errors. Regularly check tool accuracy to ensure that it meets the requirements.
- Control cutting force. Reasonably set cutting parameters to avoid excessive cutting force causing tool runout. In particular, feed rate and cutting depth need to be precisely controlled.
Vibration Mmarks of Machining Tools
- Increase the rigidity of the machine tool. Ensure the rigidity of the connection between the machine tool and the tool to reduce vibration. Use a shock absorber or increase the weight of the machine tool.
- Optimize cutting parameters. Reasonably set the cutting speed, feed speed, and cutting depth to reduce vibration during cutting. Avoid excessive cutting speed and excessive feed.
- Use vibration-reducing tools. Choose tools with vibration-reducing structures to reduce vibration marks. For example, use damping tools or composite tools.
- Improve workpiece clamping. Ensure that the workpiece is firmly clamped to avoid workpiece vibration during machining. Use multi-point clamping to improve clamping stability.
Rough Machining Tool Edge Collapse
- Use appropriate tool materials. Choose tool materials with high strength and high toughness, such as cemented carbide or superhard materials, to increase the tool’s ability to resist collapse.
- Control cutting speed and feed speed. Avoid excessive cutting speed and feed speed to reduce edge force and prevent collapse.
- Check the tool status regularly. Check the wear of the tool edge in time, and deal with abnormalities in time to avoid edge collapse.
- Optimize the use of cutting fluid. Use appropriate cutting fluid to ensure good lubrication and cooling, and reduce the force and heat accumulation on the tool edge.

Tool Installation is Not a Firm
- Check the tool clamping system. Ensure that the tool clamping system operates normally without looseness and wear. Regularly maintain and replace the clamping parts.
- Use the correct installation tools. Use professional installation tools to ensure that the tool is installed in place and clamped firmly.
- Calibrate the tool installation position. Ensure that the tool is installed in the correct position to avoid deviation from the spindle center line. Use a tool-setting instrument or laser tool-setting system for calibration.
- Check the installation status regularly. Check the installation status of the tool regularly, and adjust and fix it in time if it is loose or offset.
Inappropriate Tool Cutting Angle
- Choose the appropriate rake angle and back angle. According to the processing material and workpiece shape, choose the appropriate rake angle and back angle to optimize the cutting effect.
- Adjust the tool installation angle. Ensure that the tool installation angle meets the design requirements to avoid affecting the cutting performance due to improper installation angle.
- Use professional tool design software. Use professional tool design software to optimize the tool cutting angle and improve cutting efficiency and surface quality.
- Refer to the tool manufacturer’s recommendations. According to the tool manufacturer’s recommendations, choose the appropriate cutting angle to ensure that the tool works under the best conditions.
Improper Roughing Tool Grinding
- Use professional grinding equipment. Choose high-precision grinding equipment to ensure the quality of tool grinding and avoid affecting tool performance due to equipment problems.
- Control grinding parameters. Reasonably set the grinding speed, feed speed, and grinding depth to avoid damage to the tool due to excessive grinding.
- Maintain grinding equipment regularly. Regularly check and maintain grinding equipment to ensure normal operation of the equipment and avoid degradation of grinding quality.
- Train operators. Provide professional training for grinding equipment operators to ensure that they have the correct grinding technology and operating specifications.
The Selected Roughing Tool Does Not Match the Workpiece Material
- Select the appropriate roughing tool material. According to the characteristics of the workpiece material, select the appropriate tool material, such as carbide, ceramic or superhard material.
- Optimize the tool geometry parameters. According to the processing characteristics of the workpiece material, adjust the front angle, back angle and cutting edge shape of the tool to improve the cutting effect.
- Refer to the tool manufacturer’s recommendations. According to the tool manufacturer’s recommendations, select the tool type and specifications suitable for specific workpiece materials.
- Perform cutting tests. Perform small-scale cutting tests before formal processing to verify the matching of the tool and the workpiece material and adjust the tool parameters.
Processing Workpiece Problems
Deformation of Workpiece During Machining
- Optimize rough machining cutting parameters. Choose reasonable cutting speed, feed speed, and cutting depth to reduce cutting force and cutting heat, and reduce the risk of workpiece deformation.
- Use appropriate fixtures and supports. Ensure that the workpiece is evenly supported and clamped during machining to reduce the possibility of deformation.
- Step cutting. Use multiple light cuts to gradually remove material to avoid deformation of the workpiece caused by excessive cutting at one time.
- Control cutting heat. Use efficient coolant to reduce the impact of cutting heat on the workpiece and prevent deformation caused by thermal expansion.
Overheating of Workpiece During Machining
- Use efficient coolant. Choose the right type of coolant and ensure sufficient coolant flow to remove cutting heat in time.
- Control cutting parameters. Reasonably set cutting speed and feed speed to avoid overheating of workpieces caused by excessive cutting speed.
- Segmented machining. For workpieces that are cut for a long time, segmented machining can be used to reduce the continuous heating time of the workpiece.
- Select low thermal conductivity materials. If the workpiece material allows, select materials with low thermal conductivity coefficient to reduce cutting heat accumulation.
Scratches on the Surface of the Workpiece
- Select appropriate rough milling cutter tool materials and geometric parameters. Use tool materials with high hardness and sharpness, and optimize tool geometry parameters to reduce surface scratches.
- Use efficient coolant. Ensure that the coolant can fully lubricate the cutting area to reduce friction and scratches during cutting.
- Clean the working environment. Keep the working environment clean to prevent chips and impurities from scratching the workpiece surface during cutting.
- Control cutting parameters. Choose the appropriate cutting speed and feed speed to reduce surface scratches during cutting.
Inaccurate Positioning of the Workpiece During Processing
- Calibrate the workpiece fixture. Regularly calibrate the workpiece fixture to ensure the positioning accuracy and clamping force of the fixture.
- Use precision measuring tools. During the workpiece positioning process, use precision measuring tools (such as a three-coordinate measuring machine, tool setting instrument, etc.) to ensure accurate positioning.
- Check the clamping device. Regularly check and maintain the workpiece clamping device to prevent inaccurate positioning due to wear and looseness.
- Use CNC system compensation. Use the compensation function in the CNC system to adjust the workpiece positioning deviation and improve the positioning accuracy.
Unstable Clamping of the Processed Workpiece
- Choose a suitable fixture. According to the shape of the workpiece and processing requirements, select the appropriate fixture type to ensure uniform and stable clamping force.
- Optimize the clamping force distribution. Adjust the clamping force distribution of the fixture to avoid excessive or insufficient local clamping force, which leads to unstable clamping of the workpiece.
- Use anti-slip materials. Use anti-slip materials on the contact surface of the fixture to increase friction and prevent the workpiece from sliding during cutting.
- Check the fixture status regularly. Regularly check and maintain the fixture to ensure that the fixture is in good working condition and avoid unstable clamping.
Workpiece Processing Size Out of Tolerance
- Choose high-precision machine tools. Use high-precision machine tools and cutting tools to improve the accuracy of processing size.
- Optimize cutting parameters. Reasonably set cutting speed, feed speed, and cutting depth to reduce processing errors.
- Use precision measuring tools. During the processing, use precision measuring tools (such as three-coordinate measuring machines, measuring tools, etc.) to monitor the processing size in real-time.
- Perform compensatory processing. For workpieces with processing sizes out of tolerance, perform compensatory processing and adjust processing parameters to ensure that the size meets the requirements.
Large Residual Stress in the Workpiece
- Cutting in stages. Use multiple light-cutting methods to gradually remove materials, reduce cutting force and cutting heat, and reduce residual stress in the workpiece.
- Use efficient coolant. Ensure that the coolant can fully cool the cutting area, reduce the impact of cutting heat on the workpiece, and reduce residual stress.
- Choose appropriate roughing tool cutting parameters. Reasonably set the cutting speed, feed rate, and cutting depth to reduce stress concentration during cutting.
- Perform heat treatment. Perform appropriate heat treatment on the workpiece before or after processing to eliminate or reduce residual stress inside the workpiece.
Processing Hard Spots on the Workpiece Surface
- Choose appropriate roughing tool materials and coatings. Use tool materials with high hardness and high wear resistance, and consider using tools with wear-resistant coatings to reduce the formation of surface hard spots.
- Control cutting speed and feed rate. Reasonably set cutting speed and feed rate to reduce surface hard spots generated during cutting.
- Use efficient coolant. Ensure that the coolant can fully lubricate and cool the cutting area, reduce the accumulation of cutting heat, and prevent the formation of surface hard spots.
- Perform surface treatment. After machining, perform appropriate treatment on the workpiece surface, such as polishing, grinding, etc., to eliminate or reduce surface hard spots.
Difficult-to-machine Workpiece Materials
- Select suitable rough milling cutter tool materials. Use tool materials designed specifically for difficult-to-machine materials, such as superhard materials, ceramic tools, etc., to improve machining efficiency and tool life.
- Optimize cutting parameters. According to the characteristics of the workpiece material, reasonably set the cutting speed, feed speed and cutting depth to reduce tool wear and machining difficulty.
- Use efficient coolant. Select the type of coolant suitable for difficult-to-machine materials and ensure sufficient coolant flow to reduce cutting heat and tool wear.
- Use advanced cutting technology. When machining difficult-to-machine materials, consider using advanced cutting technologies such as high-pressure cooling, ultrasonic cutting, laser-assisted cutting, etc. to improve machining results.

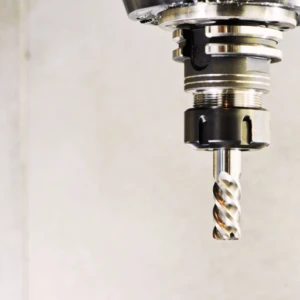
Roughing Process Problems
Rough Machining Cutting Vibration
- Enhance machine tool rigidity. Ensure the connection rigidity between the machine tool and the cutting tool, use high-rigidity fixtures to reduce vibration.
- Optimize cutting parameters. Reset cutting speed, feed speed and cutting depth to avoid excessive cutting speed and excessive feed.
- Use vibration-reducing tools. Select tools with vibration-reducing structures to reduce vibration during cutting.
- Improve workpiece clamping. Ensure that the workpiece is firmly clamped to avoid workpiece vibration during machining.
Rough Milling Cutting Force is Too Large
- Choose suitable tool materials. Use high-strength and high-toughness tool materials, such as cemented carbide or superhard materials, which can withstand large cutting forces.
- Adjust cutting parameters. Reasonably set cutting speed, feed speed, and cutting depth to reduce the size of the cutting force.
- Use lubricant.use lubricant during cutting to reduce friction between tool and workpiece and reduce cutting force.
- Optimize cutting path. Adopt a reasonable cutting path to avoid cutting force concentrated in a certain area and evenly disperse cutting force.
Rough Milling Cutting Noise is Large
- Optimize cutting parameters. Reasonably set cutting speed, feed speed, and cutting depth to reduce noise generated during cutting.
- Use vibration-damping tools. Choose tools with vibration-damping structures to reduce vibration and noise during cutting.
- Enhance machine tool rigidity. Ensure the connection rigidity between the machine tool and the tool to reduce noise caused by machine tool vibration.
- Use efficient coolant. Use coolant to lubricate and cool the cutting area to reduce noise during cutting.
Low Cutting Efficiency in Roughing
- Choose efficient roughing milling cutter tools. Use efficient cutting tools, such as multi-edge tools, coated tools, etc., to improve cutting efficiency.
- Optimize cutting parameters. According to the workpiece material and processing requirements, reasonably set the cutting speed, feed speed and cutting depth to maximize cutting efficiency.
- Use advanced cutting technology. Use advanced cutting technologies such as high-speed cutting and dry cutting to improve processing efficiency.
- Improve process automation. Introduce CNC systems and automation equipment to improve the automation of the processing process, reduce manual intervention, and improve cutting efficiency.
Cutting Heat Accumulation
- Use efficient coolant. Choose the right type of coolant and ensure that the coolant flow is sufficient to take away the cutting heat in time.
- Control cutting parameters. Reasonably set the cutting speed and feed speed to avoid excessive cutting speed causing cutting heat accumulation.
- Use intermittent cutting. During long-term cutting, use intermittent cutting to reduce the accumulation of cutting heat.
- Choose low thermal conductivity materials. If the workpiece material allows, choose materials with low thermal conductivity to reduce cutting heat accumulation.
Inconsistent Cutting Depth
- Check the machine tool and fixture. Ensure the rigidity and accuracy of the machine tools and fixtures to avoid inconsistent cutting depth due to equipment problems.
- Calibrate the tool position. Use a precision tool setting instrument or laser tool setting system to ensure the accurate tool position and avoid cutting depth errors.
- Regularly check and maintain equipment. Regularly check and maintain the machine tools, fixtures and tools to ensure they are in good working condition.
- Optimize the cutting path. Use a reasonable cutting path to ensure consistent cutting depth.
Cutting Speed is Too Low
- Choose appropriate rough milling tool materials. Use tool materials that can withstand high cutting speeds, such as carbide or ceramic tools.
- Optimize cutting parameters. According to the workpiece material and processing requirements, set the cutting speed reasonably to avoid cutting speeds that are too low.
- Use efficient coolant. Improve the stability of cutting speed through lubrication and cooling of coolant.
- Regularly check and maintain equipment. Ensure that the machine tool and tool are in good working condition to avoid low cutting speeds due to equipment problems.
Cutting Interruption
- Keep the tool and workpiece fixed. Ensure that the tool and workpiece are firmly fixed during the cutting process to avoid cutting interruption due to looseness.
- Control cutting force. Set cutting parameters reasonably to avoid cutting interruption caused by excessive cutting force.
- Use efficient coolant. Ensure that the coolant can fully lubricate and cool the cutting area to reduce the occurrence of cutting interruption.
- Regularly check and maintain equipment. Regularly check and maintain machine tools and tools to ensure that they are in good working condition to avoid cutting interruption due to equipment failure.
Burrs During Rough Milling
- Use sharp tools. Ensure that the tool edge is sharp to reduce burrs generated during cutting.
- Optimize cutting parameters. Rationally set cutting speed, feed rate, and cutting depth to reduce burr generation.
- Choose the appropriate cutting fluid. Use cutting fluid that can fully lubricate the cutting area to reduce burr formation.
- Perform secondary processing. Perform finishing after the initial cutting to remove burrs on the workpiece surface and improve surface quality.
Machine Tool Problems
Untimely Detection of Rough Machining Tool Wear
- Establish a tool management system. Use tool management software to record and monitor tool usage and wear status, and replace or repair them in time.
- Use an online monitoring system. Introduce an online tool monitoring system to monitor tool wear status in real-time, issue warnings and handle them in time.
- Check tool status regularly. Develop a tool inspection plan, regularly check tool wear, and promptly detect and handle wear problems.
- Train operators. Train operators in tool wear detection to improve their ability and awareness of detecting tool wear status.
Machine Tool Shutdown During Cutting
- Maintain and maintain machine tools. Develop a machine tool maintenance plan, and regularly inspect and maintain machine tools to prevent failures and shutdowns.
- Monitor the operating status of machine tools. Introduce a machine tool operating status monitoring system to monitor the operating status of machine tools in real-time, and promptly detect and handle abnormalities.
- Back up key components. Back up key components of machine tools to ensure that they can be quickly replaced in the event of a failure and reduce downtime.
- Optimize cutting parameters. Reasonably set cutting parameters to avoid excessive machine tool load and shutdown due to improper parameter settings.
Unreasonable Cutting Path
- Use CAD/CAM software. Use CAD/CAM software to optimize the design of the processing path to ensure that the cutting path is reasonable and efficient.
- Analyze the processing technology. Perform a detailed analysis of the processing technology to determine the best cutting path and reduce invalid cutting and path intersection.
- Adjust the tool path. According to the shape of the workpiece and the processing requirements, adjust the tool path to avoid repeated cutting and excessive path intersection.
- Perform simulation. Before actual processing, simulate the processing path to verify the rationality of the path and the processing effect.
Poor Cutting Environment
- Improve the working environment. Ensure that the ventilation and lighting of the processing workshop are good to reduce the impact of dust and chips on the processing environment.
- Control temperature and humidity. Use air conditioning or dehumidification equipment to control the temperature and humidity of the processing environment to avoid environmental changes affecting the processing accuracy.
- Clean the working area. Clean the processing area regularly to keep the working environment clean and tidy to prevent impurities and chips from affecting the processing process.
- Use protective equipment. Provide operators with necessary protective equipment, such as protective glasses, masks and protective clothing, to ensure their safety and health.
In the roughing process, perseverance is the key to overcoming difficulties and maintaining efficient work.