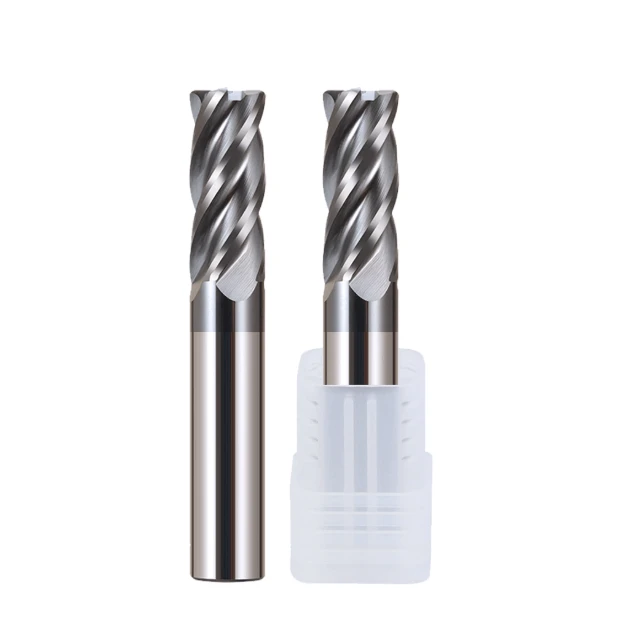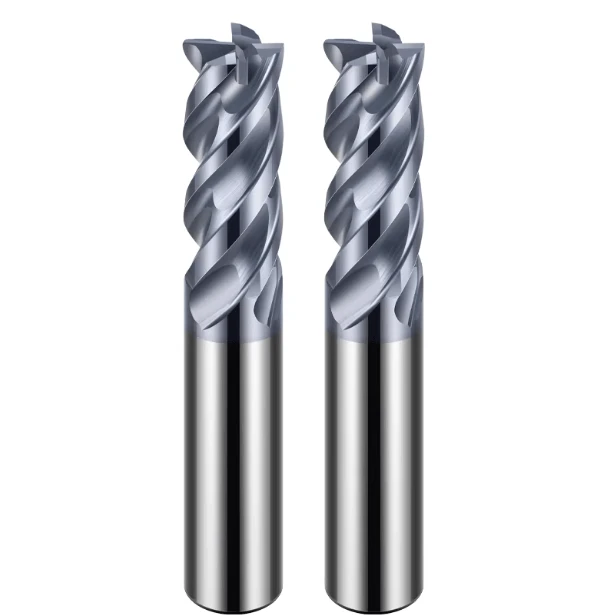


When we talk to mold-making clients in North America and Europe, we hear the same frustration: “Your carbide ball end mills are chipping at the radius less than two hours after setup.”
As manufacturers who have spent 15 years on the shop floor, we know this pain. The problem is rarely the tool’s substrate strength. When using deep-cavity tools—like HRC60 long-neck ball end mills—operators often overlook the massive gap between the “nominal diameter” and the “effective cutting speed.”
Last month, a Texas client reported that their end mill ball nose for steel was wearing out prematurely on hardened molds. We checked their data and found the culprit: shallow cuts. Because the surface speed at the tool’s apex drops to nearly zero, the tool wasn’t cutting; it was “extruding” the metal. This friction caused thermal fatigue, killing their metric ball end mills after 10 parts instead of the usual 50.
Extending tool life by 30% isn’t just about picking the right ball nose end mill suppliers. it’s a system. You have to manage everything from clamping runout to diameter compensation. If you’re still running tools at catalog speeds regardless of the cut depth, you aren’t just wasting tools—you’re wasting your machine’s most valuable hours.
Have you ever wondered if those “dead” cutters in your scrap bin still had life left in them?
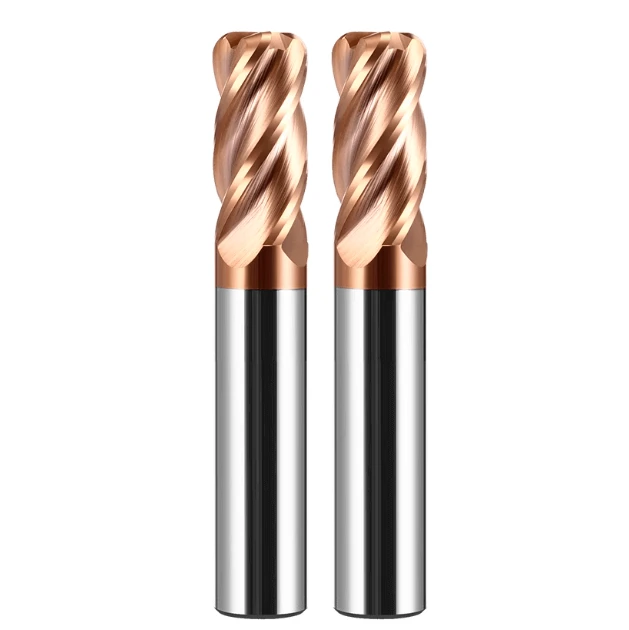
From Heat Treatment to Cutting Speed: Practical Strategies for Steel Machining
During our diagnostics, we see a common mistake: focusing only on the coating color while ignoring the balance between heat treatment and step-over. The life of an end mill ball nose for steel depends on how you manage the heat path at the edge. We once saw a client ruin a batch of P20 pre-hardened steel tools in minutes because they didn’t account for surface hardness variations.
We recommend dynamically adjusting your “chip load” based on the actual hardness of the workpiece. Don’t just follow the textbook. Watch the chips. If they turn from pale yellow to deep purple, the heat is moving from the chip back into the tool body. We use small step-overs and high feed rates to force that heat out with the chip. Preserving the toughness of the carbide ball end mills is always more profitable than blindly chasing raw speed.
Why Do Your Carbide Ball End Mills Suffer from Premature Flank Wear?
Flank wear is usually a battle between abrasion and chemical diffusion. If you look at your carbide ball end mills under a microscope and see jagged “chipping” rather than smooth wear, check your hardware. Usually, the spindle runout is too high or your collet is shot. We recently helped a shop machining 45# steel that had 0.02mm of radial runout. One edge was “gouging” while the other was slipping. That imbalance is a death sentence for tool life.
Don’t rely on “universal parameters.” Flank failure often happens when the bond between the coating and the substrate breaks down under heat. In our factory, we use precision passivation to reinforce the edge. For you, the user, we recommend slightly increasing the radial depth of cut on gummy materials like medium-carbon steel. This spreads the force across a larger area of the flank, rather than crushing the tiny radius tip.
Adjusting Surface Speed for Hardness: Solving Heat Accumulation
With hard materials, small changes in surface speed (Vc) determine if a tool lives or dies. This is critical for ball nose tools because the effective cutting diameter changes with every depth of cut. At the apex (the center point), the speed is zero. It’s a “scraping” action, not a “cutting” action. If you run a constant RPM on HRC50+ steel, the friction at that center point will soften the carbide and cause plastic deformation.
Our “pro tip” for finishing: use RAMPO-IN or helical entries to keep the center point off the material as much as possible. As material hardness goes up, we step down the surface speed. If you jump from HRC40 to HRC55, drop your Vc by 20-30%. Also, swap flood coolant for oil mist. This prevents “thermal shock”—the cracking that happens when a red-hot edge hits cold liquid. It might take a few seconds longer per part, but stable tool life is where the real money is made.
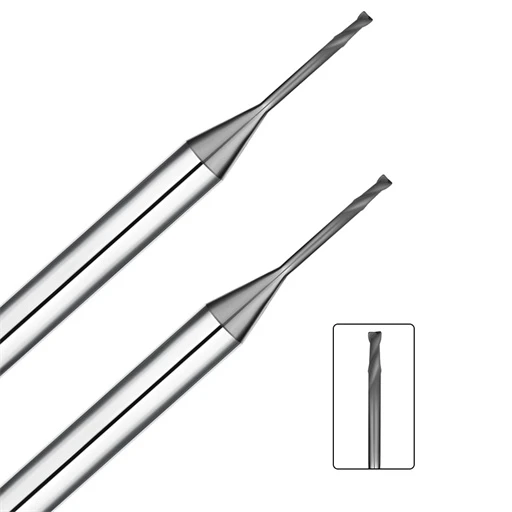
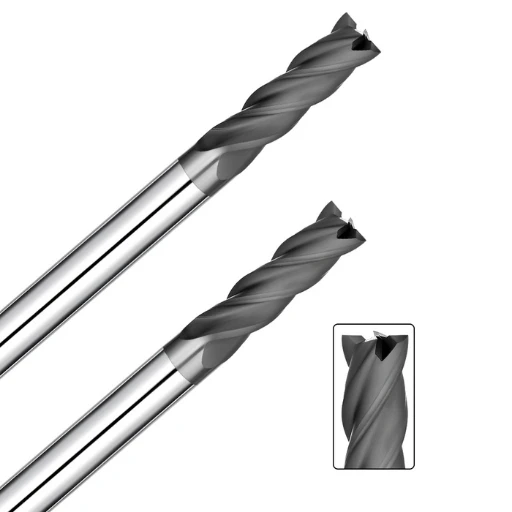
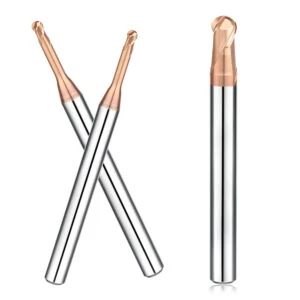
Conquering the Deep-Cavity Conundrum: A Guide to Preventing Breakage in HRC60 Long-Neck Ball End Mills
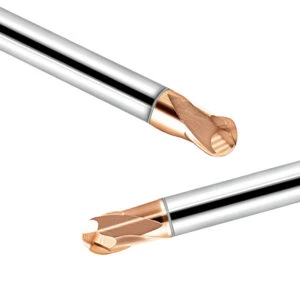
In the mold shop, deep cavities and narrow slots are a nightmare—especially when the material is over HRC60. We’ve observed that HRC60 long-neck ball end mills inherently struggle with bending strength due to their slender, extended reach. Interestingly, breakage rarely happens during the heaviest cuts. It usually happens during the transitional phases of tool entry and exit. Based on our years of experience, maintaining axial force stability is far more critical than pushing for a deeper cut.
When clearing corners or doing fine detail work, we recommend “Constant Z” (level-by-level) machining over traditional “Profile” contouring. When a long-neck tool engages a sloped surface, the sudden fluctuation in radial force can cause the shank to flex. We once helped a medical device manufacturer fine-tune a precision mold where the tool overhang was 10 times its diameter. By shifting the load from the side flutes to the contact point on the spherical tip, we kept the process stable. This adjustment is your first line of defense against breaking expensive, high-hardness tools.
Balancing Overhang and Rigidity: Using Vibration Dampening to Extend Life
Every time you double a tool’s overhang, the tip deflection increases exponentially. We often see operators choose an excessively long tool just to reach the bottom of a cavity in one go. In reality, high-frequency chatter is an invisible killer. Once resonance starts, the cutting edge micro-impacts the workpiece, causing the protective coating to flake off. We advise minimizing the tool’s “stick-out” from the holder as much as possible, even if it requires an extra tool change. It is better to change a tool than to let it “tremble” until it snaps.
To suppress vibration, we strongly suggest switching from traditional spring collets to high-precision shrink-fit holders. The 360-degree clamping force significantly boosts the tool system’s natural frequency. When we machine ultra-hard steels, we sometimes even lower the spindle speed to avoid resonance zones. It might seem like you’re losing efficiency, but by reducing the downtime from micro-chipping, we’ve seen overall productivity jump by over 20%.
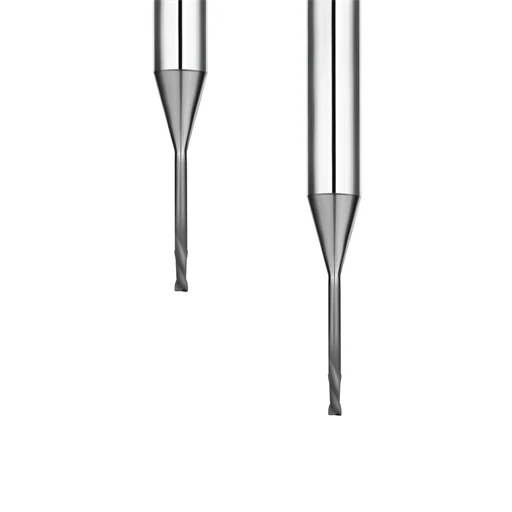
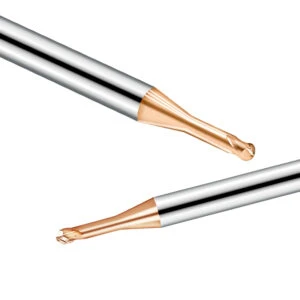
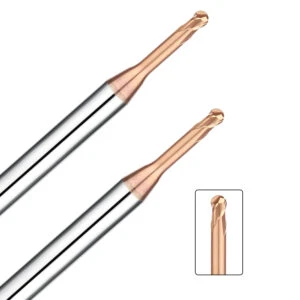
Neck Relief Design: Preventing Premature Failure from Friction
Often, a tool fails at the neck, not the cutting edge. When we customize HRC60 long-neck ball end mills, we pay close attention to the run-out and surface finish of the neck relief. If the clearance is too tight or the design is inadequate, the neck will rub against the sidewalls. This friction generates massive heat and lateral pressure, which can snap a brittle carbide shank instantly.
When programming, always verify your tool’s neck diameter and ensure enough clearance for retraction. For extreme cases, we even apply a wear-resistant coating to the neck or give it a mirror polish. It adds a bit to the manufacturing cost, but it prevents jamming and breakage during chip evacuation. An exceptional long-neck tool is defined by its “non-cutting” sections just as much as its edges.
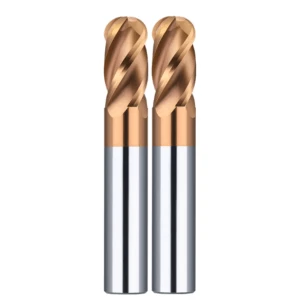
The Precision Advantage: Maximizing Run-out Tolerance for Metric Ball End Mills
In our work with high-end shops in Europe and Asia, we’ve found that the metric standard is about more than just units—it’s about a tighter tolerance ecosystem. For metric ball end mills, the fit between the shank and the holder typically follows h6 or h5 grades. We’ve found that pairing these tools with metric-standard spindles creates a more stable dimensional chain. This inherent precision is the bedrock of long tool life.
We once analyzed data for a medical implant mold client. Using identical machines, the metric tools showed much better dynamic rigidity during heavy cuts. This is because the contact area in the collet was more scientifically optimized for the shank diameter. Don’t overlook the consistency of the metric system regarding thermal expansion and fit. While the gains might not be immediate, you will see the advantage in dimensional consistency after 50+ hours of continuous machining.
Why a 0.005mm Run-out is Critical for Tool Life
There is a “golden rule” in our technical logs: if run-out exceeds 0.01mm, your tool life is cut in half. With metric ball end mills, if the load difference between the two edges exceeds 0.005mm, one edge will inevitably overload and crack. We helped a client troubleshoot electrode breakage and found the culprit was a fatigued ER collet, not the tool. Once we got the run-out down to 0.003mm, the tool life tripled—going from two parts to six parts.
Never skimp on clamping costs. For ball end mills, the cutting speed at the center axis is extremely low, which amplifies any radial run-out into a violent impact force. If you hear a “hissing” sound instead of a clean “crisp” cut, your run-out is likely too high. At that point, even the most expensive carbide grade can’t save the tool from uneven load failure.
Hydraulic vs. Shrink-Fit: Minimizing Micro-Chipping
When choosing holders for metric ball end mills, we look at the trade-off between rigidity and damping. Shrink-fit holders offer incredible rigidity and a slim profile—perfect for high-speed, light finishing. However, they don’t dampen vibration well. For high-hardness stainless steel, we prefer hydraulic chucks. The internal oil chambers absorb high-frequency harmonics, protecting the delicate radius (R-angle) of the tool.
The choice comes down to your specific goal. If you are finish-machining deep cavities at 20,000+ RPM, go with shrink-fit. If you are dealing with thin-walled parts prone to chatter, or doing semi-finishing on steel, the smooth action of a hydraulic chuck will save you a fortune in tool costs. This combination of the right holder and the right tool is how we drive down the cost-per-part in a competitive market.
Chip Evacuation and Cooling: Preventing “Gouging” in Complex Surface Milling
In complex surface finishing, cutting is only half the battle; evacuation is the other half. As a ball nose end mill moves through deep pockets or 5-axis toolpaths, the cutting zone becomes a confined, high-heat environment. We recently saw a case where a client’s high-gloss mold was ruined because the chip path clogged. When material like aluminum or soft steel adheres to the edge—known as BUE—it destroys the surface finish and causes a sudden surge in force that snaps the tool.
We recommend designing toolpaths that account for gravity and coolant flow. Don’t wait for a problem to happen; use “climb milling” during the planning stage to direct chips away from the cut and into processed areas. In our factory, we often micro-polish the tool flutes. This ultra-fine finish reduces friction, allowing chips to slide out like they are on ice. This level of detail is what separates a standard tool from a high-performance instrument.
Solving the “Re-cutting” Issue in Narrow Slot Machining
“Re-cutting”—when a tool mashes its own chips—is the silent killer of end mill ball nose for steel life. In narrow slots, if chips don’t exit immediately, they are swept back up and crushed by the rotating edges. Under a microscope, you’ll see these as irregular impact craters on the edge. We helped a gear mold client solve this by modifying their toolpath to minimize “dwell time” at the bottom of the cavity.
To fix secondary cutting, maximize your spindle’s air blast or increase high-pressure coolant penetration. If your CAM software allows it, add “air-cut” movements to give the slot some “breathing room.” Counterintuitively, we sometimes suggest slightly increasing the feed per tooth. A thicker, more brittle chip is easier to evacuate than a thin, stringy one that wraps around the tool. Remember: a chip left in the slot is a recipe for disaster.
Air Blast or Oil Mist? The Best Strategy for High-Hardness Steel
For materials over HRC50, we are often asked: “Should I use air blast or MQL?” When using carbide ball end mills on hardened steel, we generally avoid high-volume water-soluble coolants. Thermal fatigue is the main cause of carbide fracture. Flooding a red-hot tool with cold liquid causes “thermal shock.” In our trials for automotive clients, oil mist (MQL) extended tool life by 15% over air blast alone and left a superior metallic finish.
Air blast is great for the “physical sweeping” of debris during roughing. However, during finishing, oil mist is better because the microscopic oil droplets reduce the stickiness of the chips. Our logic is simple: use a powerful air blast for heavy chip volumes during roughing, then switch to oil mist for finishing to protect the tool’s nano-coating. This phased approach keeps the tool cool without the risk of thermal cracking.
Supply Chain Selection: Screening for Technical Ball Nose End Mill Suppliers
The price on a quote is just the tip of the iceberg; the real costs are found in scrap rates and downtime. Choosing ball nose end mill suppliers is about finding a technical partner, not just a vendor. If you are working with HRC60 long neck ball end mills or 5-axis surfaces and your supplier can’t provide physics-based analysis for a failure, it’s time to re-evaluate that relationship.
We prioritize suppliers who understand non-standard applications. If you’re struggling with tool adhesion on aerospace alloys, a good supplier should suggest specific edge geometries or flute polishing—not just a different coating. This shift from “selling” to “problem-solving” is the hallmark of a top-tier manufacturer. We encourage you to share your specific material hardness or blueprints with us; technical benchmarking often saves you from expensive detours.
Evaluating Coating Consistency and Substrate Toughness
Coating consistency is the “touchstone” of a quality supplier. If your tool life fluctuates by more than 20% within the same batch, check for “droplets” or poor adhesion. A coating isn’t just for color; it impacts the R-angle precision and heat dissipation. If it flakes off early, the exposed carbide ball end mills substrate will fail almost instantly under high heat.
Beyond the coating, ask about grain size. Fine-grained cemented carbide provides the flexural strength needed to prevent chipping during interrupted cuts. We can look at your blueprints and machine rigidity to help you determine if your current substrate is actually up to the task. Matching the material properties to your specific cutting load is the only way to reliably extend tool life by 30% or more.
Why Pros Recommend Modifying Your Original Cutting Paths
A professional engineer will often suggest changing your programmed path. If a supplier suggests switching from raster milling to helical ramping or Z-level contouring, it’s because they understand the tool’s geometry. The very tip of a ball nose tool has a center-line velocity of zero, which is the least efficient cutting zone. We want to keep your contact point offset from that “zero-speed zone.”
If you are trying to lower your cost-per-part, share your toolpaths with us. Often, a small tweak to the “step-over” distance or the entry/exit strategy can drastically improve how the tool handles stress. We make these trade-offs based on the tool’s neck clearance and effective cutting length. The goal isn’t just to save the tool—it’s to extract every second of production potential. If you’re ready to optimize, let’s look at your parameters together and make your process more stable.