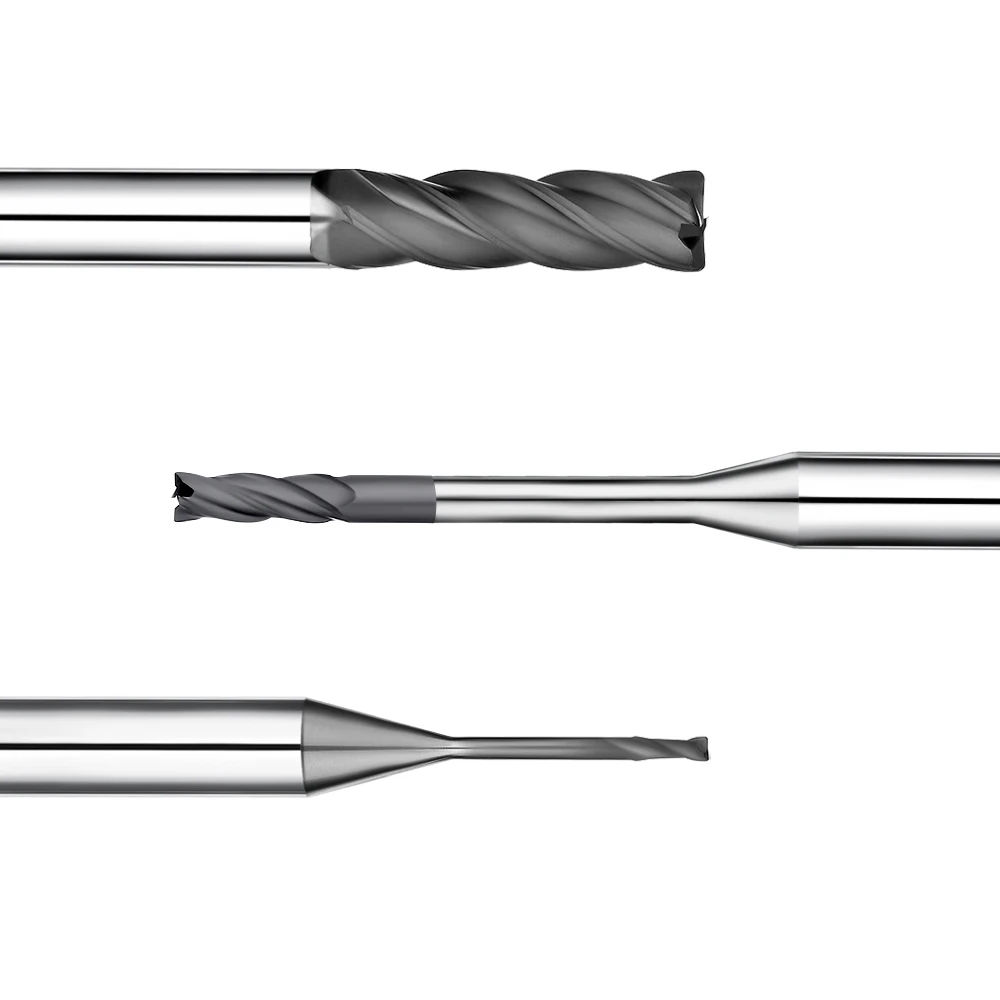
During a recent graphite electrode machining project, our field team ran into a classic problem. A client ran various graphite grades on the same high-speed CNC center, yet saw massive variations in tool wear, surface finish, and cycle times. Our on-site analysis proved the issue was not just feeds and speeds—it came down to an overlooked variable: the flute count of their graphite end mills.
Machinists often debate whether to use 1-flute, 2-flute, or 4-flute graphite end mills. Some assume single-flute cutters are best for all graphite tasks due to their large dust evacuation valleys. Others believe a 4-flute tool is always superior for finishing passes. In reality, tool performance depends on matching flute geometry directly to your graphite grade, cut type, and spindle limits.
Choosing the right graphite milling cutters directly impacts abrasive tool wear, chip and dust evacuation, and part tolerances. Graphite does not produce standard metal chips; it fractures into fine, highly abrasive dust particles. If your flutes cannot clear this dust instantly, recutting occurs. This friction rapidly wears down your cutting edges and compromises surface integrity.
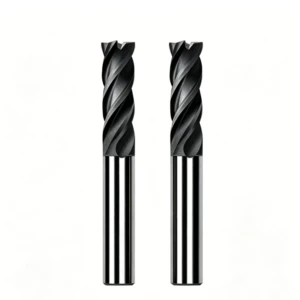
Your tooling strategy should mirror your specific operation. A 1-flute graphite end mill excels in roughing pockets where dust packing causes premature tool failure. A 2-flute graphite end mill provides the industry-standard balance of core strength and dust clearance for general electrode milling. Meanwhile, a 4-flute graphite end mill delivers higher feed rates and mirror-like finishes on rigid setups.
Selecting the best graphite end mill also involves diamond coatings, ultra-fine carbide substrates, and tool path strategies. Flute count works hand-in-hand with your vacuum extraction and spindle dynamics to deliver reliable part quality.
Drawing from years of hands-on graphite machining experience, this guide breaks down the core structural differences between 1-flute, 2-flute, and 4-flute configurations. Use this field-tested framework to pick the exact tool geometry your next electrode project requires.
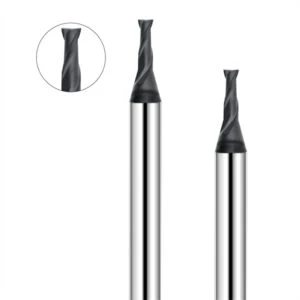
Graphite End Mill Selection: Why Flute Count Is Crucial for Graphite Machining
In our graphite electrode machining projects, tool flute count is frequently overlooked. We often see shops run identical graphite grades, CNC centers, and feeds, yet get completely different results. Some achieve long tool life and smooth finishes, while others face dust packing, edge chipping, and premature cutter failure due to improper graphite end mill selection.
Graphite machining is not just about choosing higher flute counts for faster cycle times. Optimal performance requires matching the cutter geometry to the graphite grain size, cut depth, part features, and spindle rigidity. A properly matched tool balances cutting forces, chip evacuation, and stability across the entire graphite machining process.
The Impact of Flute Count on Performance in Graphite Machining Systems
From hundreds of shop-floor setups, we know flute count directly alters cutting dynamics. Single-flute tools provide large flute valleys that clear abrasive graphite dust quickly during heavy roughing passes. Conversely, multi-flute tools increase the number of effective cutting edges, allowing higher feed rates and uniform surface finishes during finishing stages.
However, more flutes do not automatically guarantee better productivity. If machine rigidity is low, cut depths are deep, or vacuum extraction is weak, extra cutting edges cause severe dust packing and tool deflection. When configuring a graphite machining process, we always select tool geometry based on total process stability rather than flute count alone.
How Graphite End Mill Flute Count Affects Dust Evacuation and Stability
Machining brittle graphite produces micro-fine, highly abrasive dust instead of standard curled metal chips. If your graphite end mill lacks sufficient flute gullet volume, dust packs tightly into the cutting zone. This causes severe recutting, rapid abrasive flank wear, and thermal stress on the cutting edge.
For deep cavities, ribs, and narrow slots, open 1-flute or 2-flute geometries are essential to evacuate dust freely. For high-tolerance finishing on rigid setups, 4-flute graphite milling cutters provide greater core strength and reduce deflection. Always evaluate tool path strategies, air-blast pressure, and dust collection alongside your cutter choice.
Common Machining Issues Caused by Incorrect Graphite Milling Cutter Selection
Using the wrong cutter geometry causes severe production bottlenecks. A common mistake is using a high-flute tool for deep slotting, which leads to packed dust, chatter marks, and chipped electrode edges. While operators often blame the tool coating, the root cause is usually selecting the wrong flute design for the cut type.
Before setting up a job, identify your primary goal: rapid roughing or ultra-fine electrode finishing. Consider whether you are cutting porous extruded stock or ultra-fine isostatic graphite. Matching your graphite milling cutters to the specific material grade and machine setup eliminates costly scrap and stabilizes your cycle times.
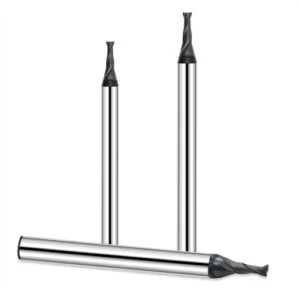
1-Flute Graphite End Mill: The Best Choice for Efficient Chip Evacuation and Roughing?
In high-volume graphite electrode machining, single-flute tools are often underutilized. When milling large electrodes, shops running multi-flute tools frequently face heavy dust packing, elevated cutting loads, and rapid abrasive wear. On-site testing proves that for operations prioritizing dust clearance and bulk material removal, a 1-flute graphite end mill delivers superior stability.
However, flute clearance is not the only factor to evaluate. Machining performance also depends on graphite density, cutter diameter, reach length, and spindle RPM capabilities. While a single-flute cutter prevents dust clogging during heavy pocketing and deep slotting, high-precision finishing passes still require alternative multi-flute geometries.
Structural Characteristics and Machining Advantages of the 1-Flute Graphite End Mill
The main design advantage of a 1-flute graphite end mill is its massive, open chip pocket. Because graphite fractures into abrasive dust rather than shearing into chips, this open gullet lets fine particles escape immediately. Clearing dust quickly eliminates secondary recutting, which significantly reduces friction and preserves the diamond cutting edge during aggressive roughing.
Because a single-flute tool has only one cutting edge per revolution, table feed rates are naturally lower at standard RPMs. We compensate for this by leveraging high-speed spindles, maximizing feed per tooth, and optimizing step-over strategies. Successful implementation requires balancing machine rigidity, dust collection airflow, and aggressive chip evacuation.
Why Is the Single-Flute Design Ideal for Graphite Dust Evacuation?
A constant challenge on the shop floor is managing micro-fine, abrasive graphite dust. Without adequate flute volume, dry graphite powder compacts against the cutter body and the workpiece wall. This packed dust generates extreme heat and friction, leading to edge chipping and thermal micro-cracking in the carbide substrate.
A single-flute cutter provides the widest physical pathway for graphite dust evacuation. When paired with high-pressure air blasts and industrial vacuum extraction hoods, this geometry clears airborne debris instantly. Keeping the cutting zone clean reduces edge degradation and prevents chatter in deep-pocket roughing.
1-Flute Graphite End Mill: Suitable CNC Graphite Machining Scenarios
Single-flute cutters are the go-to geometry for high-efficiency bulk material removal and roughing. They excel in pre-machining large automotive mold electrodes, opening deep structural pockets, and plunging narrow slots where dust cannot easily escape. In these high-load operations, preventing dust packout is critical to maintaining tool life.
In practical CNC graphite machining projects, we recommend single-flute tools for the roughing phase of porous or standard-density graphite blocks. Once the bulk stock is cleared, operators should transition to 2-flute or 4-flute graphite end mills for semi-finishing and final surface profiling. Matching tool geometry to each phase ensures optimal efficiency and part precision.
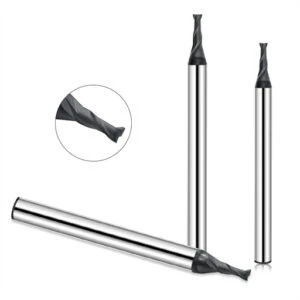
2-Flute Graphite End Mill: A Versatile Solution Balancing Efficiency and Stability
In our daily graphite electrode machining setups, 2-flute tools remain the true shop workhorse. Many mold-and-die shops find that 1-flute cutters lack cycle efficiency on finishing passes, while 4-flute tools risk dust packing in deep cavities. On-site machining data confirms that a 2-flute graphite end mill strikes the perfect balance between chip evacuation, core rigidity, and feed rates.
No single cutter solves every milling challenge, but the 2-flute design handles the widest operational envelope. It provides ample flute clearance for abrasive dust while doubling the tooth engagement over single-flute cutters. For general electrode fabrication and cavity roughing, it delivers dependable tool life and tight part tolerances across varied setups.
The Cutting Balance Advantages of 2-Flute Graphite End Mills
From a tool-geometry perspective, the 2-flute graphite end mill balances cutting resistance with structural strength. Compared to single-flute tools, two cutting edges double the table feed at identical chip loads. Compared to 4-flute designs, the wider flute gullets allow fine graphite dust to escape freely, preventing the abrasive recutting that causes thermal tool breakdown.
When cutting complex 3D electrode contours, balanced cutting forces prevent tool deflection and edge chipping. Pairing optimized flute rake angles with diamond coatings ensures smooth chip evacuation and chatter-free performance. This stability allows operators to push feeds and speeds while maintaining sharp part details on fine-grain graphite blocks.
Why Is the 2-Flute Design a Common Choice for Graphite Machining?
Most electrode job shops standardize on 2-flute cutters for general graphite machining operations. Their primary advantage is exceptional process versatility across different graphite grades. Whether cutting coarse extruded stock or dense isostatic graphite, a 2-flute tool adapts easily through routine feed and speed adjustments.
However, specific cut geometries may require alternative tools. Aggressive bulk roughing often benefits from 1-flute chip clearance, while shallow high-speed finishing runs faster with 4-flute cutters. We always recommend auditing your feature depth, dust extraction airflow, and cycle time goals before locking in a 2-flute graphite milling cutter.
Application of 2-Flute Graphite End Mills in Electrode Machining
Manufacturing high-precision EDM electrodes demands crisp corner retention, minimal burring, and uniform surface finishes. Because graphite is prone to micro-chipping at sharp corners, the predictable cutting forces of 2-flute tools provide the stability needed to protect delicate ribs and thin walls.
In production CNC environments, we size 2-flute cutters to match electrode geometry and pocket depth. Short-reach stub tools maximize rigidity on small ribs, while standard lengths handle general pocketing. Selecting the correct diamond coating and flute length ensures your graphite milling cutters deliver repeatable accuracy across long unattended runs.
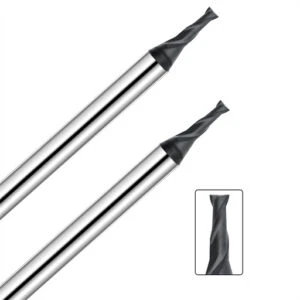
4-Flute Graphite End Mill: A Finishing Solution for Enhanced Efficiency and Surface Quality
In high-precision graphite electrode machining, achieving tight tolerances and mirror-like finishes requires dedicated tooling. Many shops finish 3D contours with 2-flute cutters, only to battle visible step-over marks and slow feed rates. Switching to 4-flute graphite end mills during semi-finishing and finishing stages significantly improves surface consistency and shortens cycle times.
However, a 4-flute design is not a universal fix for every graphite machining operation. Adding cutting edges increases tool rigidity and allows faster table feeds, but it reduces flute gullet space. If applied in deep roughing without adequate vacuum airflow, abrasive dust packs tightly and ruins the cutting edge. Matching tool geometry to the finishing allowance is critical.
How Do 4-Flute Graphite End Mills Boost Machining Efficiency?
The primary efficiency advantage of a 4-flute cutter comes from doubling the tooth engagement per revolution compared to a 2-flute tool. Under identical chip loads, table feed rates can be doubled, dramatically cutting cycle times. This makes multi-flute geometry ideal for shallow-pass profile milling, thin-rib machining, and high-speed finishing paths.
Distributing the cutting load across four flutes reduces individual tooth wear and dampens harmonic vibration on rigid machining centers. To fully capitalize on this geometry, we optimize tool paths with light radial step-overs (ae) and balanced spindle speeds. This approach maintains continuous cutting action while preventing excessive heat buildup in the carbide core.
The Impact of Multi-Flute Structures on Graphite Surface Finish
Achieving a superior graphite surface finish depends heavily on continuous, low-vibration cutter engagement. Four cutting edges minimize the interrupted-cut impact shock common in low-flute cutters, preventing micro-chipping on delicate EDM electrode details. The result is a uniformly sheared graphite surface that reduces or eliminates manual bench polishing.
However, achieving flawless surface quality requires strict control over tool runout and toolholder overhang. If spindle rigidity is poor or tool extension is excessive, multi-flute tools can chatter and mar the graphite workpiece. We always recommend using short-reach tools, balanced shrink-fit holders, and fine-grain isostatic graphite to achieve optimal surface finishes.
When Should You Choose a 4-Flute Graphite End Mill?
A 4-flute cutter is the premier choice for finishing precision EDM electrodes, complex 3D mold geometries, and high-tolerance contours with light depths of cut. Its increased core diameter resists deflection, ensuring straight sidewalls and sharp corner retention where tight geometric tolerances are non-negotiable.
Conversely, avoid 4-flute tools during aggressive roughing or deep slotting where high-volume chip evacuation is the priority. Successful graphite electrode machining relies on a staged tooling workflow: roughing bulk stock with 1-flute or 2-flute cutters, then deploying 4-flute graphite milling cutters for final high-speed surface passes.
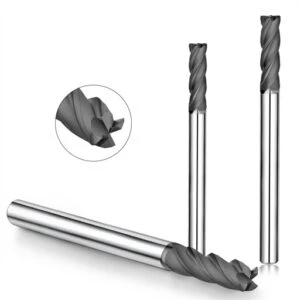
1-Flute vs 2-Flute vs 4-Flute Graphite End Mills: Which Flute Count Is Best for Graphite Machining?
Machining engineers frequently ask our team: “What is the best flute count for graphite machining?” We often see shops test 1-flute, 2-flute, and 4-flute tools on the same batch of graphite stock, only to get wildly inconsistent tool life, surface roughness, and cycle times. The decisive factor is never the flute count alone, but how well the cutter geometry matches your specific cut strategy.
There is no universal tool for every graphite electrode project. Flute count represents a trade-off between dust evacuation volume, core rigidity, and feed rate potential. Understanding this structural balance allows programmers to select the right tool geometry rather than guessing based on generic tooling catalogs.
Matching Flute Counts to Machining Objectives
When evaluating 1-flute vs. 2-flute vs. 4-flute graphite end mills, we always start by defining your primary objective. Are you roughing large pockets or profiling high-precision electrode ribs? For aggressive bulk roughing, open chip clearance takes priority; for high-speed finishing passes, dynamic stability and continuous edge engagement matter most.
The ideal tool geometry always depends on your specific machining envelope. Single-flute tools provide maximum dust evacuation for deep slotting; 2-flute tools deliver the best balance of efficiency and stability for general milling; and 4-flute tools maximize surface quality on rigid, high-RPM setups. Matching tool geometry to your setup eliminates chatter and extends cutter life.
Logic for Selecting Flute Counts for Roughing, Semi-Finishing, and Finishing
A reliable CNC workflow never uses a single tool configuration for an entire graphite part. During initial roughing passes, we prioritize rapid material removal rates and abrasive dust evacuation. Using 1-flute or 2-flute tools with large chip gullets prevents graphite dust packing, which causes tool deflection and heat-induced edge failure.
During semi-finishing and finishing stages, the priority shifts to tight dimensional tolerances, corner sharpness, and clean surface finishes. Here, 2-flute tools handle general contours, while 4-flute graphite end mills excel at light-radial-depth finishing passes. Distributing the cut load across multiple edges stabilizes the cutter and eliminates manual hand-polishing.
Graphite End Mill Selection Strategies Based on Material Hardness and Density
Graphite material properties directly dictate tool wear patterns. Coarser, lower-density graphite fractures into heavy dust clouds, requiring maximum chip evacuation space to avoid packing. Conversely, high-density, fine-grain isostatic graphite exerts higher cutting resistance and accelerates abrasive flank wear, demanding superior edge strength and cutter rigidity.
When milling ultra-fine, high-density graphite grades, tool geometry must be paired with thick diamond coatings to combat abrasive wear. Using rigid 2-flute or 4-flute configurations prevents edge micro-chipping on delicate electrode ribs. Effective graphite end mill selection balances material hardness, dust extraction, and spindle dynamics for consistent shop-floor results.
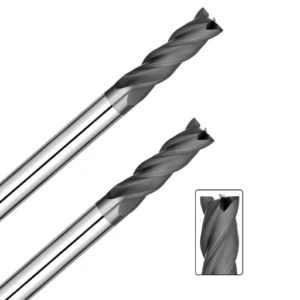
Best End Mill for Graphite Machining: What Factors Matter Beyond Flute Count?
When configuring tooling setups, engineers often fixate solely on flute count—debating between 1-flute, 2-flute, or 4-flute designs. However, shop-floor data shows that flute count is only one piece of the puzzle. When changing flutes yields no improvement, the bottleneck almost always traces back to the carbide substrate, protective coating, helix geometry, or cutting parameters.
Selecting the best end mill for graphite machining requires evaluating the entire tooling system. Because graphite is extremely brittle and creates highly abrasive micro-dust, an optimal cutter must combine sharp cutting edges with extreme wear resistance. Achieving tight part tolerances demands structural balance between the core geometry, coating adhesion, and machine dynamics.
How Do Diamond-Coated Graphite End Mills Extend Tool Life?
For production graphite electrode machining, we consistently recommend CVD diamond-coated tooling. Uncoated carbide tools run on high-density isostatic graphite often suffer severe abrasive flank wear and dimensional drift within minutes. Upgrading to diamond-coated graphite end mills provides the extreme hardness required to maintain razor-sharp cutting edges across long, unattended runs.
CVD diamond coatings provide a crystalline barrier that resists continuous micro-abrasion from airborne graphite dust. By maintaining edge sharpness, diamond coatings reduce cutting forces, eliminate burring on thin electrode ribs, and prevent thermal degradation. For lights-out electrode manufacturing and tight-tolerance mold components, diamond coating is an absolute requirement.
The Relationship Between Carbide Substrates and Machining Stability
Tool coating performance depends directly on the quality of the underlying carbide substrate. Many machinists assume all micro-grain carbide performs identically in graphite, but sub-micron grain structure, binder content, and cobalt distribution dictate core stability. Poor substrate selection leads to premature coating delamination and catastrophic edge chipping.
For reliable performance, a premium carbide graphite end mill uses an ultra-fine micro-grain substrate with low cobalt content (typically around 6%). This composition maximizes substrate hardness while ensuring superior diamond coating adhesion. The resulting tool rigidity dampens harmonic chatter, resists deflection on long-reach tools, and preserves critical electrode features.
The Impact of Tool Diameter, Helix Angle, and Flute Geometry on Performance
Geometric parameters beyond flute count heavily dictate cutting behavior. Even between two 2-flute tools, variations in helix angle and core thickness yield vastly different results. A standard 30° helix provides balanced vertical lifting force for dust evacuation, while lower helix angles reduce axial pull when cutting fragile, thin-walled electrode ribs.
When selecting graphite end mills, always match tool diameter, reach-to-diameter ratio, and flute core thickness to your cavity depth. Short, stubby reach lengths maximize rigidity, while open flute gullets ensure continuous dust evacuation in deep pockets. Aligning overall tool geometry with your specific cut path ensures predictable, high-precision machining results.
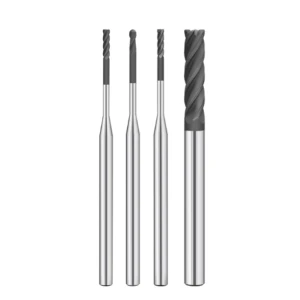
How a Graphite Milling Cutter Supplier Delivers the Right Tool Selection Solution
In our field experience machining EDM electrodes and mold components, tool failures rarely stem from tool manufacturing defects alone. Instead, bottlenecks almost always trace back to a mismatch between cutter geometry and actual shop-floor parameters. Repeatedly swapping flute counts without addressing spindle speeds, dust extraction, or material grade yields minimal productivity gains.
An experienced graphite milling cutter supplier looks beyond generic catalog numbers to evaluate your entire production workflow. Whether milling micro-ribs, deep pocket geometries, or high-density blocks, the best tooling solution balances machine tool rigidity, graphite grain structure, and cycle time targets. Proper tool selection requires an engineered approach across every machining phase.
What Machining Parameters Should a Tooling Supplier Audit?
A knowledgeable tooling partner analyzes the full operating window rather than just tool diameters and stick-out lengths. We evaluate spindle RPM limits, chip load per tooth, axial and radial depths of cut, and dust extraction airflow. This diagnostic data helps us pinpoint whether chatter, rapid wear, or rib chipping is caused by cutter geometry or programmed parameters.
Before simply replacing a worn cutter, audit your complete cutting recipe. In many cases, optimizing flute count, core taper, and feed rates resolves vibration and dust packing without costly machine modifications. In modern graphite machining, the cutting tool operates as part of an integrated system spanning the machine, the CAD/CAM path, and the workpiece.
Matching Graphite End Mills to Machine Tools, Materials, and Machining Objectives
There is no universal cutter that excels across every graphite grade and CNC platform. High-speed, high-rigidity machining centers unlock the full feed potential of multi-flute, micro-grain cutters. Conversely, older or lighter-duty machines benefit from low-cutting-force 2-flute geometries that minimize harmonic chatter and prevent workpiece edge chipping.
When milling ultra-fine isostatic graphite, abrasive flank wear demands high-hardness substrates and specialized diamond coatings. If your primary goal is maximizing electrode cycle times, separate your tooling into high-clearance roughing cutters and rigid multi-flute finishing tools. We match specific graphite end mills to each cut stage to guarantee predictable part quality.
Custom Diamond Coated Graphite End Mills for Specialized Applications
Standard off-the-shelf cutters often fail to meet the tight tolerances required for micro-electrode ribs, deep-reach cavities, and unattended lights-out runs. These complex setups demand tailored core diameters, custom corner radiuses, and high-adhesion CVD diamond coatings. In these demanding environments, custom diamond-coated graphite end mills deliver the edge retention needed to eliminate dimensional drift.
If your shop battles short tool life, uneven surface finishes, or frequent tool changes, an in-depth tooling review can transform your workflow. By aligning cutter diameter, flute count, relief angles, and diamond coating specs to your exact graphite material, we engineer reliable graphite machining solutions tailored to your production goals.
FAQ: Graphite End Mill Flute Count
Tool flute count is one of the most common questions CNC programmers and operators bring to our tooling team. When choosing graphite end mills, shops often struggle to decide between 1-flute, 2-flute, and 4-flute geometries. Across hundreds of graphite electrode and mold projects, we have proven that flute count must work in harmony with tool geometry, material grade, and spindle rigidity.
This FAQ breaks down the practical engineering logic behind choosing the right graphite end mill flute count. Use these field-tested insights to match your tool geometry directly to your cut stage, graphite grain density, and surface roughness requirements.
What is the best flute number for graphite machining?
There is no universal best flute number for graphite machining across all applications. For aggressive roughing where dust evacuation is the bottleneck, 1-flute and 2-flute designs provide the large chip gullets needed to prevent dust packing. For semi-finishing and finishing, 2-flute and 4-flute tools deliver superior edge stability and surface consistency.
To determine the ideal flute count, analyze your current machining phase and cut geometry. Roughing EDM electrodes requires open flutes to evacuate abrasive particles freely, while finishing complex 3D profiles demands multiple cutting edges to maximize feed rates and maintain sharp corners.
Is a 1-flute graphite end mill better for graphite?
A 1-flute graphite end mill excels in deep-slotting and pocket roughing operations where dust packout causes premature tool breakage. The single open gullet provides the maximum pathway for fine graphite dust to escape, significantly lowering cutting resistance and preventing heat buildup during high-volume stock removal.
However, a single-flute cutter is not ideal for every pass. Because table feed rates are limited by single-edge engagement per revolution, it is less efficient for finishing passes. For shallow profiling and tight part tolerances, 2-flute or 4-flute cutters provide much better dimensional consistency and cycle time efficiency.
Is a 4-flute graphite end mill suitable for finishing?
A 4-flute graphite end mill is an outstanding choice for semi-finishing and final finishing passes on rigid CNC setups. Engaging four cutting edges per revolution doubles your programmed feed rate, dampens harmonic vibration, and creates an exceptionally smooth surface finish on delicate graphite electrodes.
However, avoid using 4-flute tools in deep-pocket roughing or high-engagement slotting. The reduced flute valley volume easily clogs with abrasive dust, leading to excessive friction and edge chipping. Deploy 4-flute cutters primarily for light radial step-over finishing and thin-rib profiling.
Should I choose a diamond coated graphite end mill?
A CVD diamond-coated graphite end mill is essential for machining medium-to-high-density isostatic graphite or running long, lights-out batches. Uncoated micro-grain carbide wears down rapidly against abrasive graphite dust, while thick diamond coatings maintain sharp cutting edges and hold tight tolerances across extended cycles.
If your shop battles rapid flank wear, tapered electrode sidewalls, or frequent tool changeovers, diamond coating delivers the best return on investment. Always ensure the diamond coating is applied to a low-cobalt micro-grain carbide substrate to prevent premature coating delamination.
What is the best end mill for graphite machining?
The best end mill for graphite machining is the tool configuration engineered to match your specific cut parameters and graphite grade. Finding the right solution requires balancing flute count, core taper, helix angle, carbide substrate quality, and diamond coating adhesion.
Rather than searching for a single magic tool, establish a staged tooling workflow. Use open 1-flute or 2-flute cutters to clear bulk stock and evacuate abrasive dust, then switch to high-rigidity 4-flute diamond-coated graphite end mills for final high-speed surface passes.