
With over 15 years on the front lines of CNC tool manufacturing and process optimization, our daily routine involves working with various carbide rod stocks or helping machining clients in Europe and the US resolve frustrating, on-site production failures.
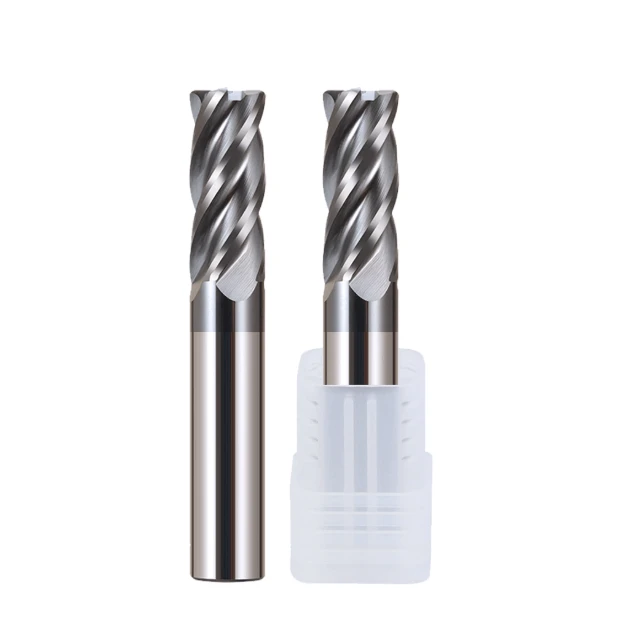
Last month, an aerospace client in the US Midwest contacted us. Their process supervisor was deeply frustrated because they were running a high-volume job of high-precision 316L valve bodies. To balance chip evacuation with rigidity, they had selected a standard 4 flutes end mill for stainless steel.
However, the tool’s lifespan was wildly inconsistent. A single tool would sometimes last for a full three hours of cut time, but other times, it would suffer sudden edge chipping after less than 20 minutes—leaving ugly chatter marks on the workpiece.
This is a recurring pain point for almost every shop machining austenitic stainless steel or duplex alloys. Stainless steel’s low thermal conductivity, high work-hardening tendency, and notorious stickiness mean that even tools marketed as the best endmill for stainless steel often fail in real-world setups.
As a specialized carbide end mill for stainless steel manufacturer, we know that catalog specifications often fall short when subjected to the harsh realities of the machine shop—complete with erratic coolant pressure and spindle vibration.
To solve this, we cannot simply rely on blindly reducing feed rates or flooding the part with coolant. We must conduct a “forensic autopsy”—using high-magnification microscopy to analyze every minute wear pattern on the retired carbide endmill.
Did the coating flake off prematurely due to extreme cutting heat? Or did microscopic chipping occur at the honed edge as it engaged the hardened layer? What is the best end mill coating for stainless steel capable of protecting the substrate?
In the following sections, we will skip the dry textbook theories. Drawing on firsthand wear data from dozens of workshops across Europe and the US, we will discuss the hidden secrets behind tool failure.
Does your workshop have a pile of tools where the cutting edge was snapped off by stuck stainless steel chips long before the flank face showed normal wear?

Why does 16 years of frontline experience tell us that diagnosing the wear patterns of 4 flutes end mills for stainless steel is the key to boosting efficiency?
On the shop floor, many operators instinctively toss a worn tool into the scrap bin and grab a fresh one to keep the spindle running. To us, however, that means throwing away an invaluable on-site diagnostic report. Every unexpected tool breakage, poor surface finish, or dimensional deviation leaves a unique physical mark on the cutting edge of your 4 flutes end mill for stainless steel.
We often see workshops opt for overly conservative cutting parameters in the name of safety. Ironically, this causes the tool to rub repeatedly against the material, which rapidly exacerbates heat buildup. By analyzing the microscopic wear patterns of retired tools, we can pinpoint whether you are dealing with normal mechanical abrasion or impact fatigue.
Beyond Textbook Theory: Real-World Challenges in Stainless Steel Machining
Standard cutting tool manuals suggest that machining austenitic stainless steel simply requires inputting recommended speeds and feeds. However, standing next to the machine reveals a far more complex reality. At our clients’ facilities, we frequently encounter materials like 316L and high-hardness 17-4PH, which cause heat to accumulate heavily on the delicate cutting edge, leading to instant softening.
Furthermore, stainless steel is highly prone to work hardening. If a preceding cutting pass causes plastic deformation, it leaves behind a surface layer of extreme hardness for the next pass to encounter. These cyclic impacts rapidly lead to fatigue failure of even the best endmill for stainless steel—a problem that cannot be solved simply by adjusting coolant flow or reducing spindle speed.
How We Reverse-Engineer Process Flaws Using Spent Tools
As a premium carbide end mill for stainless steel manufacturer, we have maintained a specific practice for over a decade. We periodically have our technical engineers arrange for European and American clients to ship back boxes of their used carbide end mills. In our precision laboratory, we examine these tools under Zeiss microscopes at magnifications of several hundred times.
By examining the wear patterns on these used tools, we act like detectives to pinpoint subtle process shortcomings within the customer’s workshop. This approach—using reverse analysis of a used carbide endmill to identify machining flaws—not only reduces unnecessary downtime for tool changes but also allows us to optimize geometric parameters far beyond standard industry manuals.

Key Insights: Identifying the Right Endmill for Stainless Steel Based on Four Typical Wear Patterns
Tool wear is inevitable, but its specific pattern tells a story. When your 4 flutes end mill for stainless steel wears down uniformly, your machining system, tool geometry, and cutting parameters are in perfect harmony. Conversely, sudden, localized edge blowouts signal severe flaws in your current setup. Reading these micro-wear patterns on the cutting edge is like running a non-invasive diagnostic on your entire CNC setup.
During our shop visits in the US and Europe, we often hear machinists complain that a certain cutter “just doesn’t perform.” However, a closer look under high magnification usually reveals a simple application mismatch rather than a bad tool. Understanding these physical wear indicators helps you troubleshoot heat and stress in real time, making it easy to confirm if you are using the best endmill for stainless steel for your specific setup.
Flank Wear: Determining if Your Carbide Endmill’s Grain Size Matches the Cutting Speed
Flank wear is the most predictable and “healthy” way for a tool to retire, driven by steady abrasion from hard particles within the alloy. A smooth, uniform wear land across the cutting edge shows your process is stable. However, if this wear land widens rapidly within minutes of cutting, your surface speed (Vc) is likely too high, or your carbide endmill substrate lacks the necessary red-hardness to withstand the friction.
From a metallurgy standpoint, resisting flank wear requires a delicate balance between micro-grain carbide structure and cobalt content. If the grain size is too coarse, those grains will tear out under the extreme shear forces of austenitic alloys. As a manufacturer, we adjust these grain structures based on your shop’s cutting speeds to prevent premature dulling. If flank wear is your bottleneck, try dropping your cutting speed by 15% or switching to a tougher carbide grade.
Notch Wear and Work Hardening: Why the “Work-Hardened Layer” of Stainless Steel Often Causes Tool Breakage at Specific Depths
A highly frustrating issue is notch wear, where a deep groove grinds into the cutting edge precisely at the depth-of-cut line (Ap line), leading to sudden failure. During cutting, the surface of stainless steel plastically deforms under heavy shear forces, creating a brutally hard, work-hardened skin. Notch wear happens because that single point on your cutter repeatedly slams into this localized, hardened layer.
To combat this notch-induced breakage, we highly recommend shifting your depth of cut dynamically using trochoidal milling or variable-depth paths. This simple programming tweak prevents stress from concentrating on a single spot of the tool. As a specialized carbide end mill for stainless steel manufacturer, we also combat this by applying negative rake profiles and reinforced edge prep to give that specific zone the mechanical strength to survive.
Chipping: 16 Years of Experience Distinguishing Between Excessive Feed (Fz) and Thermal Shock
Nothing stops a job faster than a chipped cutting edge. While chipping is common, you must diagnose the root cause: is it mechanical overload from excessive feed rates and recutting chips, or is it thermal fatigue cracking from uneven coolant flow? These two failures look similar to the naked eye, but their solutions are completely opposite.
If you see tiny, evenly spaced cracks perpendicular to the cutting edge, those are thermal cracks. When machining stainless steel, cutting zone temperatures spike past 1000℃, and intermittent coolant splashes subject the carbide to rapid thermal shock, causing the edge to flake away. Instead of blindly backing off your feed rate, try running high-pressure coolant, minimum quantity lubrication (MQL), or even dry dynamic milling to keep temperature cycles stable.
Built-Up Edge (BUE): How Material Adhesion Can Ruin a High-Quality Stainless Steel End Mill
Every CNC programmer knows how sticky austenitic stainless steel can be. Under high cutting pressures and temperatures, the metal literally friction-welds itself to the rake face of your tool, creating a BUE. This temporary buildup alters the tool’s geometry, increases cutting forces, and eventually breaks off—frequently tearing away microscopic chunks of the carbide substrate with it.
Preventing BUE requires lowering the friction coefficient of the tool surface and cutting off the chemical affinity between the workpiece and the carbide. When setting up high-volume slotting, we focus heavily on super-polishing the flutes and applying the best end mill coating for stainless steel. A highly lubricious coating acts as a slippery barrier, letting hot chips slide right out before they can weld to the cutting edge.
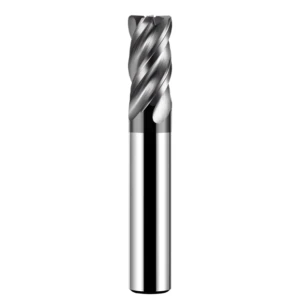
Real-World Wear Resistance of Coatings: How to Select the Best End Mill Coating for Stainless Steel
The coating on your tool acts as the critical “body armor” that determines its ultimate run time. Because stainless steel cannot dissipate heat through its chips efficiently, extreme thermal energy is driven directly back into the cutting edge. Without a high-performance coating acting as a thermal shield, the carbide substrate would soften and deform within seconds under heavy loads.
Many shops make the mistake of choosing a coating based solely on catalog hardness, ignoring the chemical inertness and toughness required to handle sticky materials. Field tests show that coating performance varies wildly depending on the alloy grade and your toolpath strategies. To push your cycle times safely, you must select the best end mill coating for stainless steel that is specifically tailored to your heat generation and chip evacuation limits.
Comparative Testing: Real-World Tool Life Differences Between AlTiN, AlCrN, and nACo Coatings
In our performance testing, we push different coating formulations to their absolute limits. A standard AlTiN coating does a reliable job on medium-hard alloys because its high-temperature Al2{O3 layer acts as an excellent insulator. However, AlTiN’s higher friction coefficient can cause severe chip clogging and built-up edge when milling gummy alloys like 316L.
For those gummy materials, AlCrN coatings perform much better because of their low friction coefficient and superior anti-adhesion qualities, making them a great choice for deep slots. But when we run aerospace-grade duplex alloys, nACo coatings deliver the ultimate tool life. With a hybrid nanocrystalline structure, nACo maintains high hardness at temperatures up to 1100℃, making it the absolute best endmill for stainless steel running high-speed dynamic paths.
The Truth About Coating Delamination: How We Address Coating-to-Carbide Adhesion Issues
Machinists often confuse standard coating wear with premature coating delamination. If a coating flakes off in large sheets early in a run—exposing bare carbide—it is not because the coating lacks hardness. The issue is a weak physical bond between the coating and the tool substrate. When heavy cutting forces hit, a poorly bonded coating will peel away like wet paint.
As a dedicated carbide end mill for stainless steel manufacturer, we know that preventing this requires extreme discipline in our prep work. Before coating, our tools undergo proprietary micro-blasting and specialized chemical cleaning to strip away the cobalt-depleted surface layer left from grinding. This micro-texture, combined with a graded transition layer, ensures the coating bonds seamlessly like skin, preventing delamination even under heavy cutting stress.
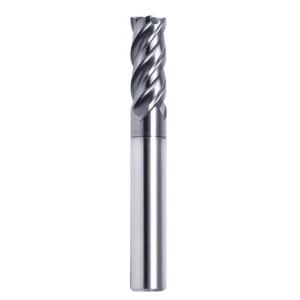
4 Flutes End Mills for Stainless Steel – Troubleshooting Real-World Errors: The Three Most Common Mistakes on the Shop Floor
In our daily technical support work, we frequently receive broken or abnormally worn cutters returned by customers. Often, technicians instinctively blame tool quality or the carbide raw material itself. However, a deep dive into their CNC programs, spindle speeds, feeds, and toolpaths usually reveals that the root cause lies in cutting parameter mismatches or systemic flaws in machining strategies.
To help you avoid these pitfalls, we have summarized three typical errors frequently made on the shop floor when using a 4 flutes end mill for stainless steel. These mistakes not only exponentially shorten tool life but also severely compromise surface finish and dimensional accuracy. Re-evaluating and optimizing your programs based on these common “danger zones” can lead to immediate improvements in machining efficiency.
Error 1: Setting Spindle Speed Too Low—A Misguided Attempt to Protect the Tool That Backfires
When machining austenitic alloys, many operators instinctively run the spindle very slow, fearing that higher speeds will cause the tool to overheat. However, this conservative strategy often backfires on the shop floor. Stainless steel work-hardens rapidly; if the cutting speed is too low, the cutting edge dwells on the material for too long, rubbing and compressing the surface instead of cleanly shearing through it.
This friction creates a brutally hard surface layer for the next tooth pass to encounter, rapidly chipping the tool tip. Furthermore, low-speed cutting fails to generate enough local heat to achieve plastic material flow, letting the metal’s “stickiness” take over. This sticky chip welds to the carbide, creating an unstable BUE that ruins even the best endmill for stainless steel in minutes.
Error 2: Blindly Using Excessive Depth of Cut in Tight Pockets, Leading to Instant Breakage
4-flute tools are renowned for their rigidity in slotting or heavy profile milling. However, you must strike a rational balance between metal removal rates and chip clearance. In the pursuit of cycle time, many programmers specify excessive axial depths of cut () in deep cavities or narrow slots where chip clearance is restricted, overlooking a critical physical reality.
While a 4 flutes end mill for stainless steel possesses excellent core strength, its individual flute volume is significantly smaller than that of 2- or 3-flute cutters. When the depth of cut is too deep, the high volume of sticky chips instantly clogs the flutes. Within milliseconds, cutting forces spike exponentially, causing the tool to snap instantly under immense radial torque.
Error 3: Ignoring the Importance of Climb Milling, Inviting Repetitive Micro-Chipping
In traditional shops, conventional milling was once the standard choice to eliminate backlash on older machines. However, on modern CNC machining centers, sticking to conventional milling is a nightmare for tool life. The cutting edge enters the material at zero chip thickness, sliding and rubbing against the workpiece before actually cutting, which rapidly wears down your carbide endmill.
Conversely, climb milling lets the cutting edge enter at maximum chip thickness and exit at zero, letting the tool bite quickly into the metal and carry cutting heat away with the chip. However, remember that climb milling throws chips behind the tool. You must pair this strategy with targeted, high-pressure coolant to flush those work-hardened chips away, preventing the tool from recutting them on the next rotation.
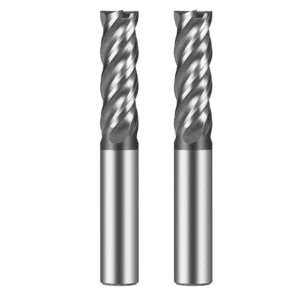
Finding Cost-Effective Alternatives: How to Evaluate the True Technical Capabilities of a Carbide End Mill Manufacturer
Under intense pressure to control machining costs, many workshop managers are looking to replace expensive, premium imported brands with cost-effective alternatives. However, this does not mean gambling on cheap, inferior cutters. Machining stainless steel is a challenging task that demands exceptional material consistency and grinding precision, or your cost savings will be instantly wiped out by scrap parts and downtime.
We believe that evaluating a carbide end mill for stainless steel manufacturer requires looking far beyond the glossy machine lists in their brochures. True technical prowess lies in how they control the most minute, microscopic details of the grinding process. If you are seeking a stable, long-term tool supplier, you can quickly identify a genuine partner by observing how they manage edge quality and technical support.
Look Beyond the Presentation: How the Manufacturer Controls Edge Honing Consistency
In cutting tool manufacturing, microscopic edge treatment—specifically honing and polishing—is the critical process that determines tool life. A cutting edge fresh off the grinding wheel is extremely sharp but microscopically serrated; if used immediately on tough alloys, it will chip instantly. A qualified manufacturer must perform micron-level edge honing to create a tiny, protective radius along the edge.
This is precisely where a manufacturer’s consistency is put to the test. If you notice that some cutters in the same batch last two hours while others last only thirty minutes, it indicates flaws in their honing consistency. If you are machining precision parts, you should ask your supplier how they ensure the cutting edge radius (R-value) tolerance for each batch of your carbide endmill is maintained within the strict range.
Depth of Technical Support: Customizing Geometric Profiles Based on Your Specific Stainless Steel Grade
Stainless steel is not a monolithic category; different chemical compositions and heat-treatment states result in vastly different machining characteristics. For instance, machining 316L requires tools with sharp profiles, large rake angles, and highly polished chip flutes to combat stickiness. Conversely, high-strength 17-4PH demands wider edge lands and negative rake angles to enhance core rigidity.
A truly professional manufacturer’s core competitiveness lies in their ability to provide application-specific solutions rather than a “one-size-fits-all” catalog tool. If you are currently struggling with challenging, non-standard stainless steel parts, we encourage you to share your specific operating conditions, part drawings, or difficult material grades with us. We can collaborate to customize a 4 flutes end mill for stainless steel tailored to your exact spindle limits and setups.